Step 11 — Name and save your site
Goal
Turn the boundary into a saved site you can return to.
Background
A boundary on its own is not much use tomorrow. Naming it makes it a site: it appears in your list, keeps its own view layout, and carries its own indicator values.
Steps
- Give the site a Title — required — and an optional Description.
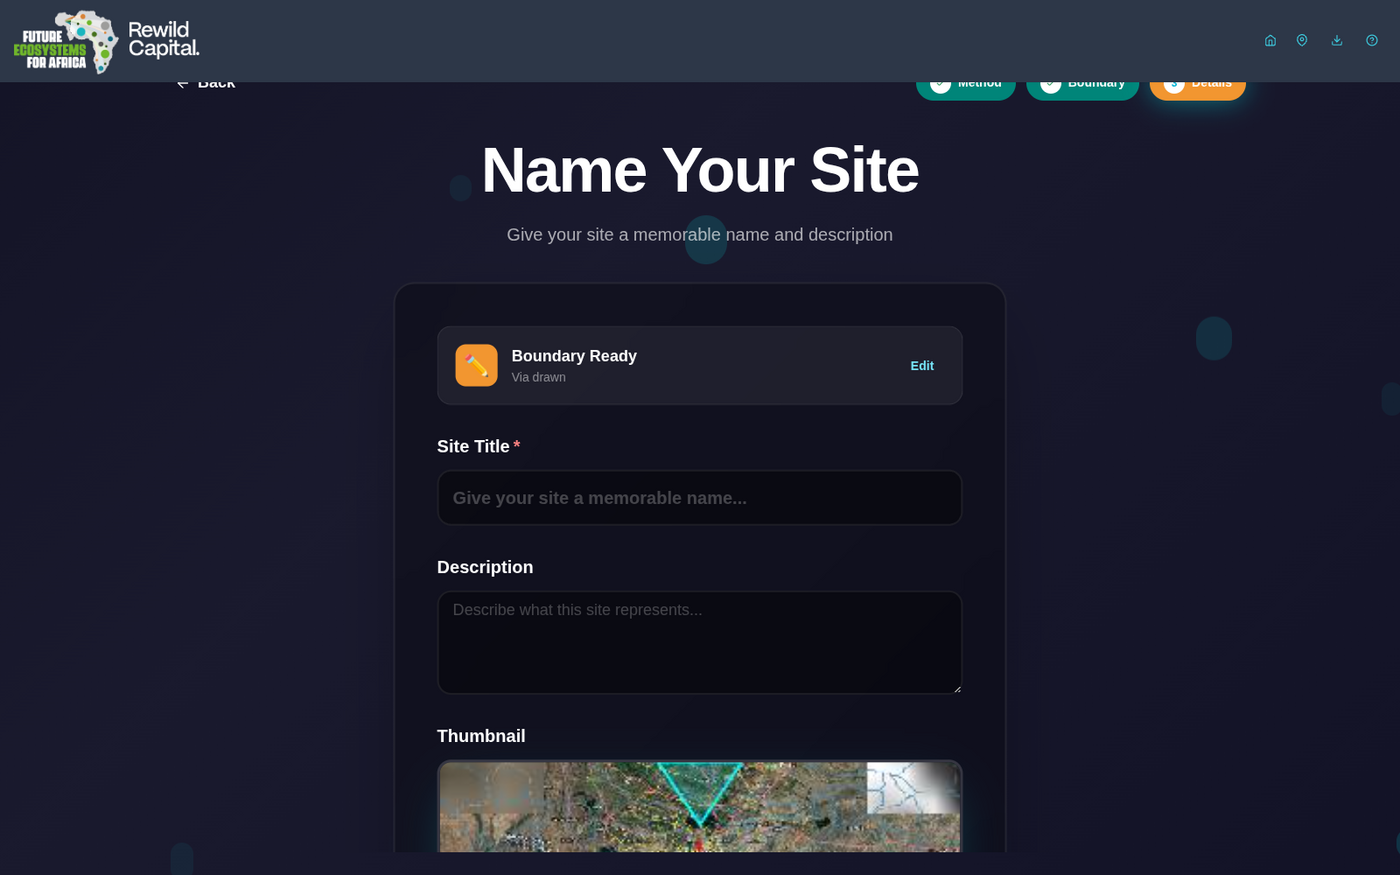
- Confirm the auto-captured Thumbnail, or replace it by dragging an image in or clicking to browse. Maximum 5 MB.
- Click Create Site. You land directly in the map view for your new site.
Your sites
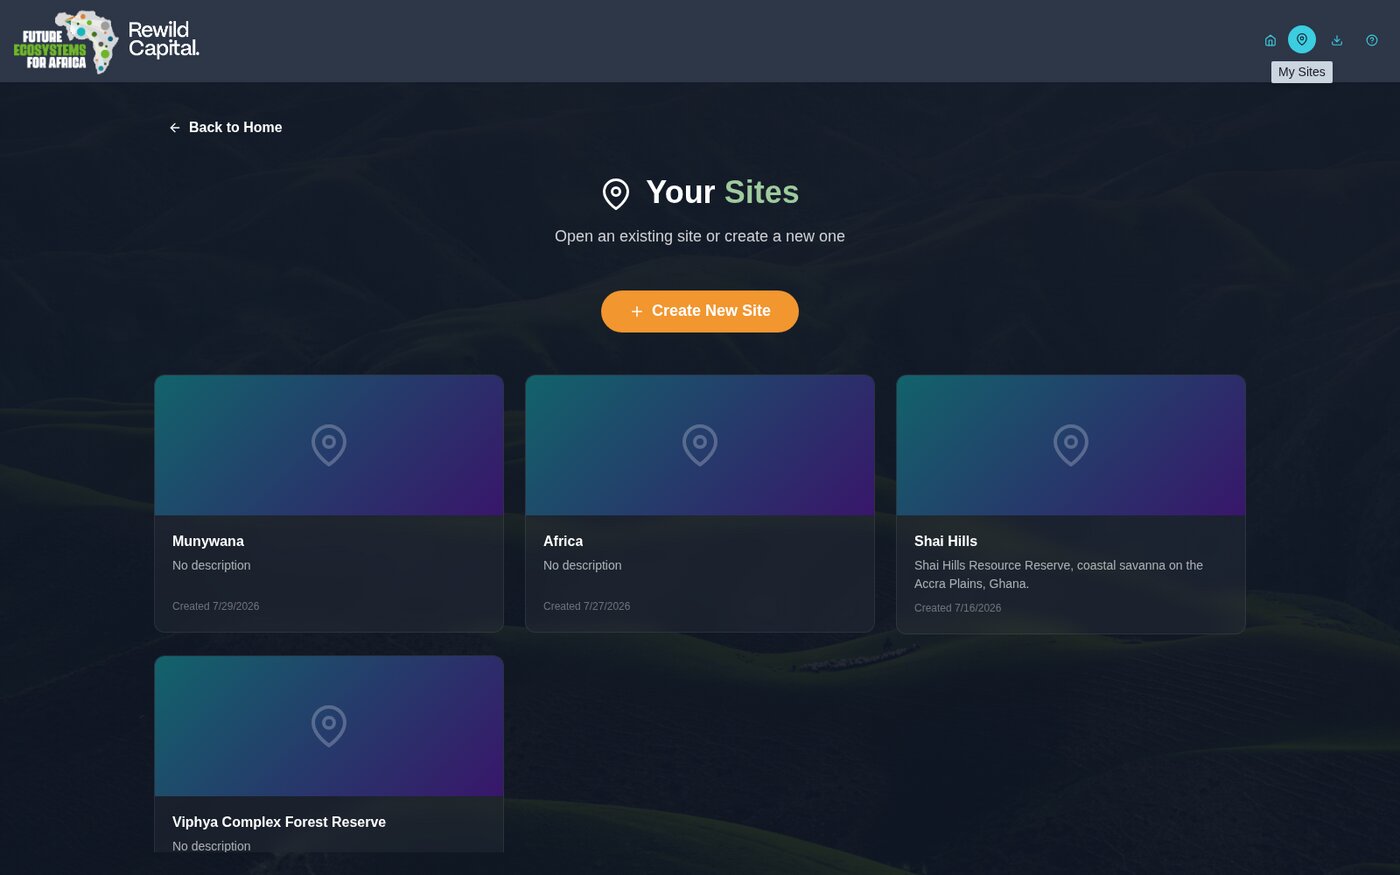
Each card shows the thumbnail, title, description and creation date. Hovering reveals Edit, Clone and Delete; clicking the card body opens the site.
| Action | What it does |
|---|---|
| Open | Restores your saved layout, scenarios and factor selections |
| Edit | Change title, description and thumbnail |
| Clone | Pre-fills the wizard with this site's boundary under a new name |
| Delete | Permanent, with a confirmation prompt |
Demo sites
The four built-in demo sites never show edit, clone or delete — they are meant to stay in their demonstration state.
What you achieved
- Your site is saved and appears in Your Sites
- You can reopen it with your layout restored
- You know how to edit, clone and delete sites