Step 14 — Refine a boundary
Goal
Adjust a site's shape after the fact.
Background
Study areas rarely survive first contact with the data. Boundary editing lets you add or remove whole catchments, or move individual vertices, without recreating the site.
Indicators are re-extracted automatically for the new shape.
Steps
- Open the site, then click the pencil (Edit site boundary) in the header.
- A banner explains the active tool, and a floating panel offers two independent tool pairs.
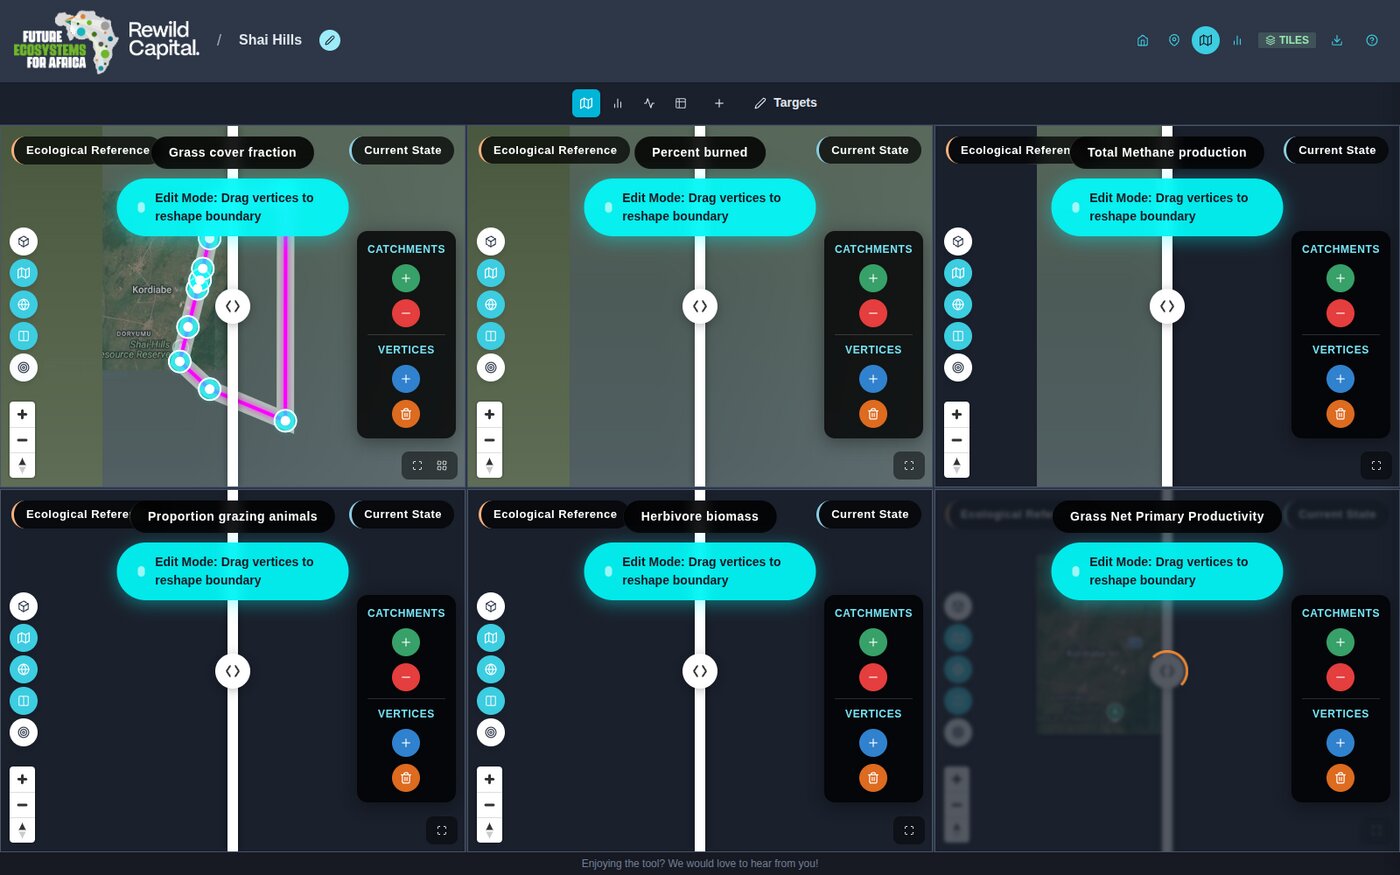
| Tool | What it does |
|---|---|
| Add / Remove catchments (green + / red −) | Click a catchment to union it into, or subtract it from, the boundary |
| Add / Delete vertices (blue + / orange trash) | Click the boundary line to insert a vertex, or an existing vertex to remove it |
- With no tool selected, drag the glowing cyan vertex handles directly to reshape the boundary.
- Click the pencil again to leave edit mode.
There is no confirm step
Edits apply immediately as you drag or click — there is no separate Save or Cancel. When you exit edit mode, indicators are automatically re-extracted if the boundary changed.
What you achieved
- You can add and remove catchments from a boundary
- You can insert, move and delete individual vertices
- You know edits apply immediately and trigger re-extraction