Accessing PostGIS from QGIS using a pg_service file
Deploy the initial stack
In your server terminal, deploy the initial stack by running either make configure-ssl-self-signed or make configure-letsencrypt-ssl. The initial stack consists of the Nginx, Hugo Watcher and Watchtower services.
Use make configure-ssl-self-signed if you are going to use a self-signed certificate on a localhost for testing. Use make configure-letsencrypt-ssl if you are going to use a Let’s Encrypt signed certificate on a name host for production. The make configure-ssl-self-signed will deploy the Nginx, Hugo Watcher and Watchtower services, but after running make configure-letsencrypt-ssl you will need to run make deploy-hugo to deploy the Nginx, Hugo Watcher and Watchtower services.
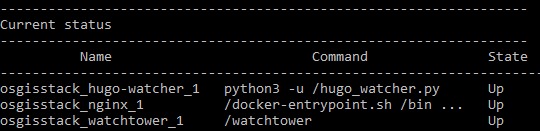
Use make ps to view the services running. The following services should be up:
Deploy the PostgreSQL and PostGIS service
Deploy the PostgreSQL and PostGIS service using make deploy-postgres. If you already have PostgreSQL installed on your local machine, ensure that you specify a different port number for the Postgis Public Port other than port 5432, the default port for PostgreSQL. For example, you can use the port number 5434.

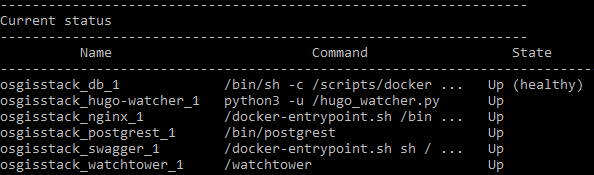
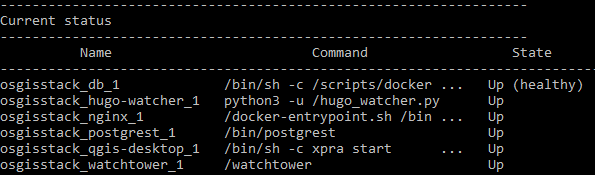
Use make ps to view the services running. The following services should be up:
The PostgreSQL and PostGIS service has the following databases:
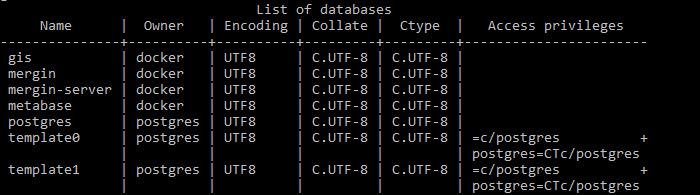
In this workflow, you will be connecting to the gis database.
Using the pg_service file on the client side of the stack (where it references the external port)
Edit your local connection service file
On your local machine, the per-user connection service file can be at ~/.pg_service.conf or the location specified by the environment variable PGSERVICEFILE. Add a service to this connection service file with the following service name and connection parameters.
[osgs]
dbname=gis
user=docker
port=<POSTGRES_PUBLIC_PORT>
password=<POSTGRES_PASSWORD>
host=
sslmode=require
For the port and password connection parameters, use the POSTGRES_PUBLIC_PORT and POSTGRES_PASSWORD specified in the .env file. For the host connection parameter, use the hostname of the server where you have set up OSGS.
For more information on the PostgreSQL connection service file see the PostgreSQL documentation.
Setting up your PostGIS connection in QGIS (locally)
QGIS Desktop can be downloaded from here and installed using these instructions.
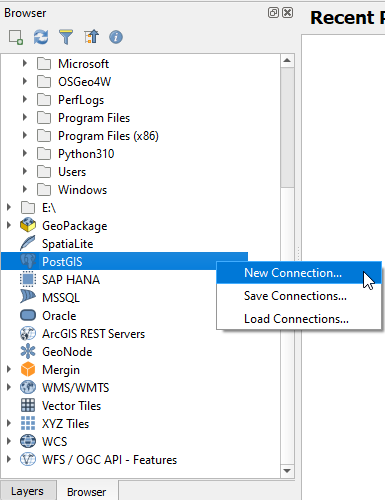
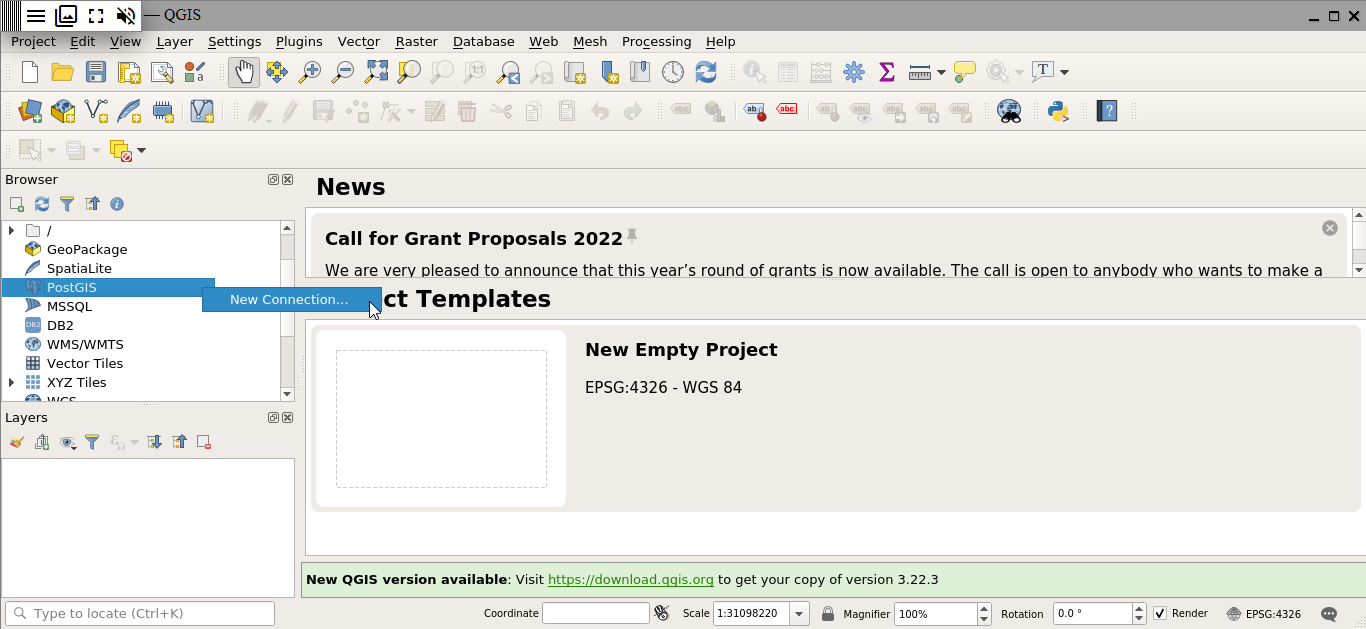
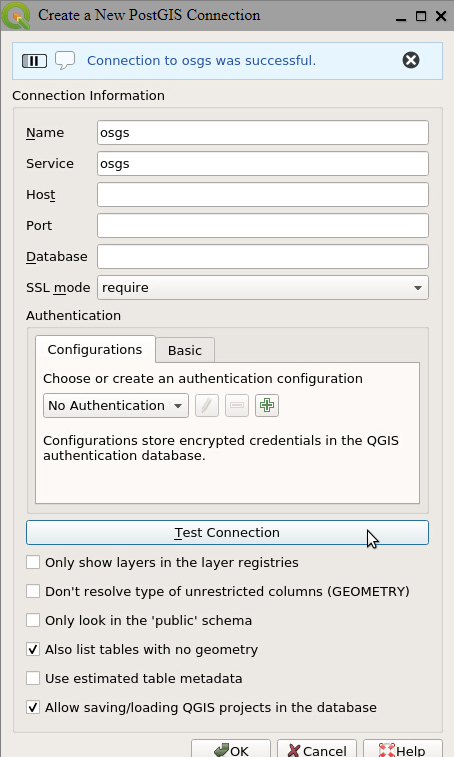
On your local machine, open QGIS Desktop. In your Browser Panel, right click on the PostGIS option and click on “New Connection”. This will open the Create a New PostGIS Connection dialogue.
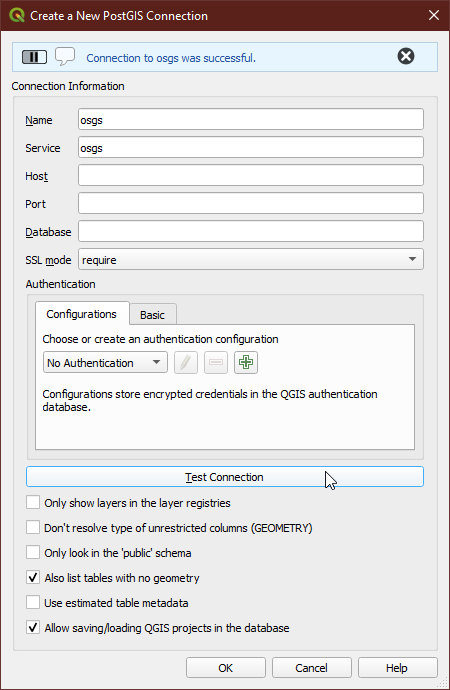
In the Connection Information section, give the connection an appropriate name. For the service, enter the service name that you specified in the connection service file. Set the SSL mode to require and ensure you have enabled the Also list tables with no geometry and the Allow saving/loading QGIS projects in database options. Once all the configuration options have been set, click on “Test Connection”. Once you see the Connection to <Name> was successful message, click “OK”. You have now successfully connected to the PostgreSQL and PostGIS service gis database.
Loading data into the gis database
There are multiple ways to load vector data into a PostGIS database. Some of them are:
- using the PgAdmin Browser
- using the ogr2ogr commandline utility
- using the shp2pgsql conversion utility
- using the QGIS DB Manager
- using the “Export to PostgreSQL” Database option from the Processing Toolbox in QGIS.
- using the “Export to PostgreSQL” GDAL options in QGIS
To load raster data into a PostGIS database some of the tools you can use are the:
- the PgAdmin Browser
- the raster2pgsql conversion tool
In this workflow, you will be using the “Export to PostgreSQL” Database option from the Processing Toolbox in QGIS to export a vector layer from QGIS to the gis database, creating a new relation.
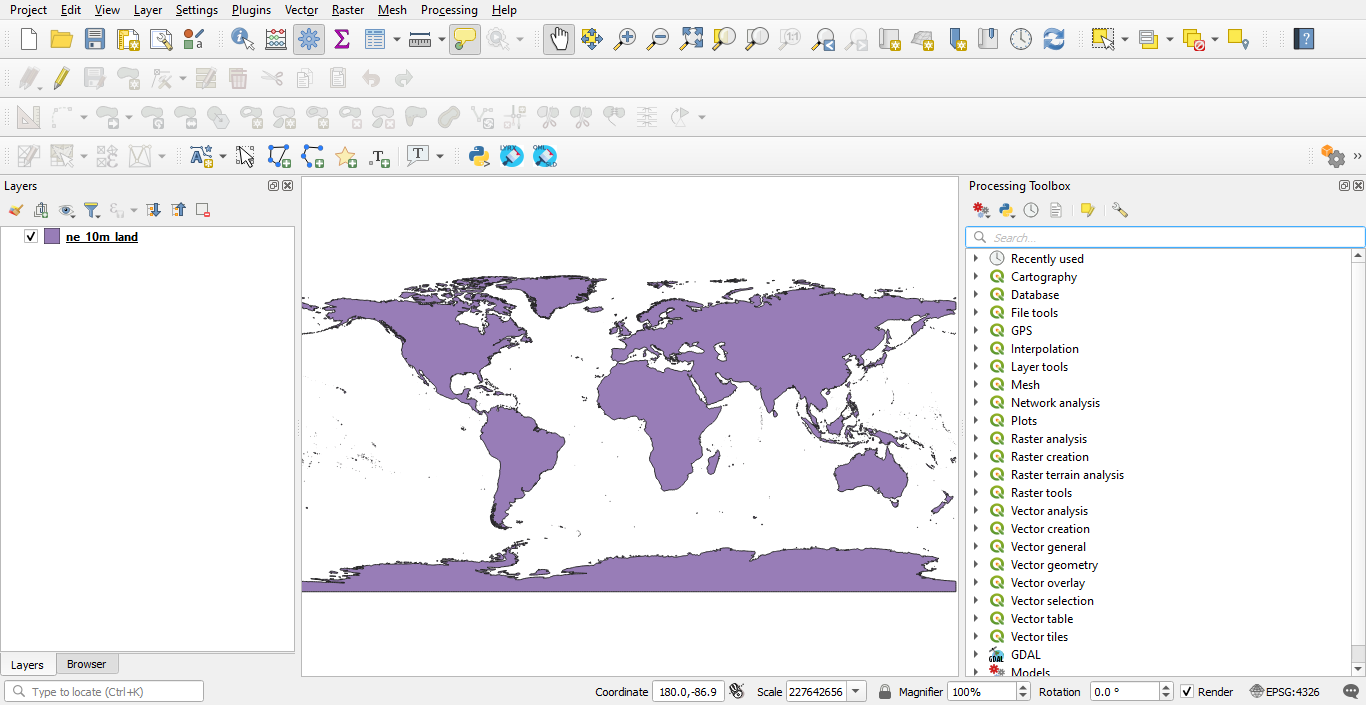
First, download the Natural Earth Land dataset from this link. Unzip the downloaded ne_10m_land.zip file then drag and drop the ne_10m_land.shp shapefile into QGIS.
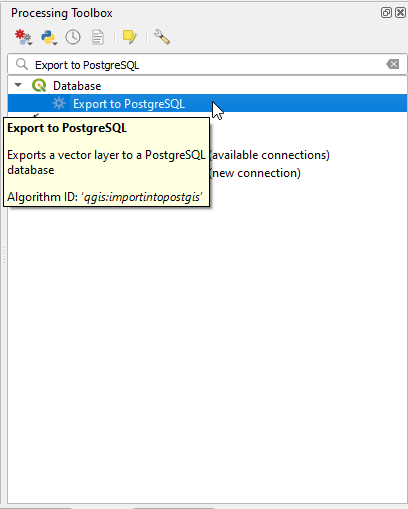
In the Processing Toolbox Panel, search for the “Export to PostgreSQL” option and double-click on the result in the Database category.
In the Export to PostgreSQL dialogue specify the following parameters and click “Run”. More information on each of these parameters is provided here.
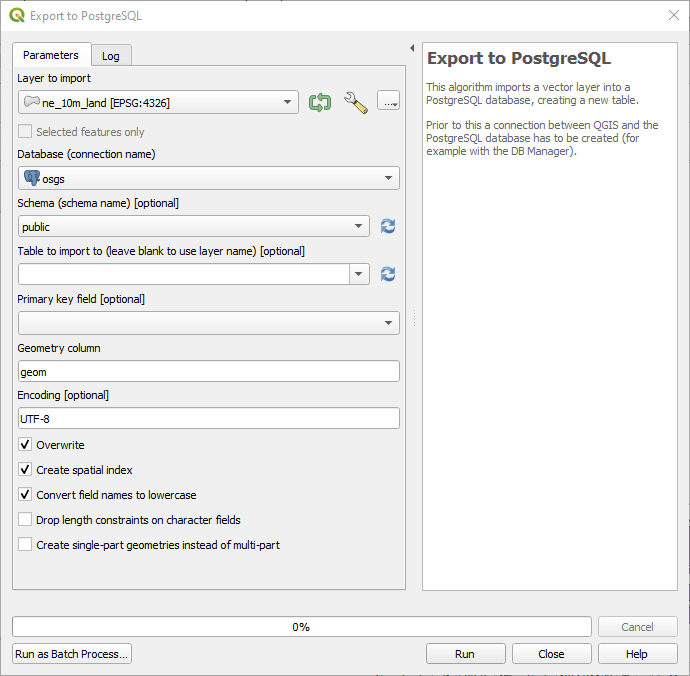
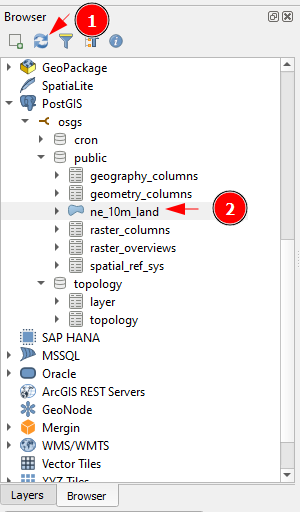
Once the export is done, you should see an Algorithm 'Export to PostgreSQL' finished message in the Log. In the Browser Panel, click on Refresh. You will see the ne_10m_land table in the public schema.
Using the pg_service file on the server side of the stack (where it references the internal port)
Creating the server-side connection service file
To create the server-side connection service file, run the command cp conf/pg_conf/pg_service.conf.example conf/pg_conf/pg_service.conf in the terminal. In the conf/pg_conf/pg_service.conf file, add a service with the same name as the service you set up in the pg_service.conf file on your local machine. The service should have the following service name and connection parameters.
[osgs]
dbname=gis
user=docker
port=<POSTGRES_PRIVATE_PORT>
password=<POSTGRES_PASSWORD>
host=db
sslmode=require
For the port and password connection parameters, use the POSTGRES_PRIVATE_PORT and POSTGRES_PASSWORD specified in the .env file. For the host connection parameter specify the hostname as db.
Setting up your PostGIS connection in the QGIS Desktop service
Deploy the QGIS Desktop service using make deploy-qgis-desktop. Use make ps to view the services running. The following services should be up:
The QGIS Desktop service is now accessible on /qgis-desktop/ e.g. https://localhost/qgis-desktop/. Log in to the service using the username <NGINX_AUTH_USER> and password <NGINX_AUTH_PWD> specified in the .env file.
In your Browser Panel, right click on the PostGIS option and click on “New Connection”. This will open the Create a New PostGIS Connection dialogue.
In the Connection Information section, give the connection an appropriate name. For the service, enter the service name that you specified in the connection service file. Set the SSL mode to require and ensure you have enabled the Also list tables with no geometry and the Allow saving/loading QGIS projects in database options. Once all the configuration options have been set, click on “Test Connection”. Once you see the Connection to <Name> was successful message, click “OK”. You have now successfully connected to the PostgreSQL and PostGIS service gis database.
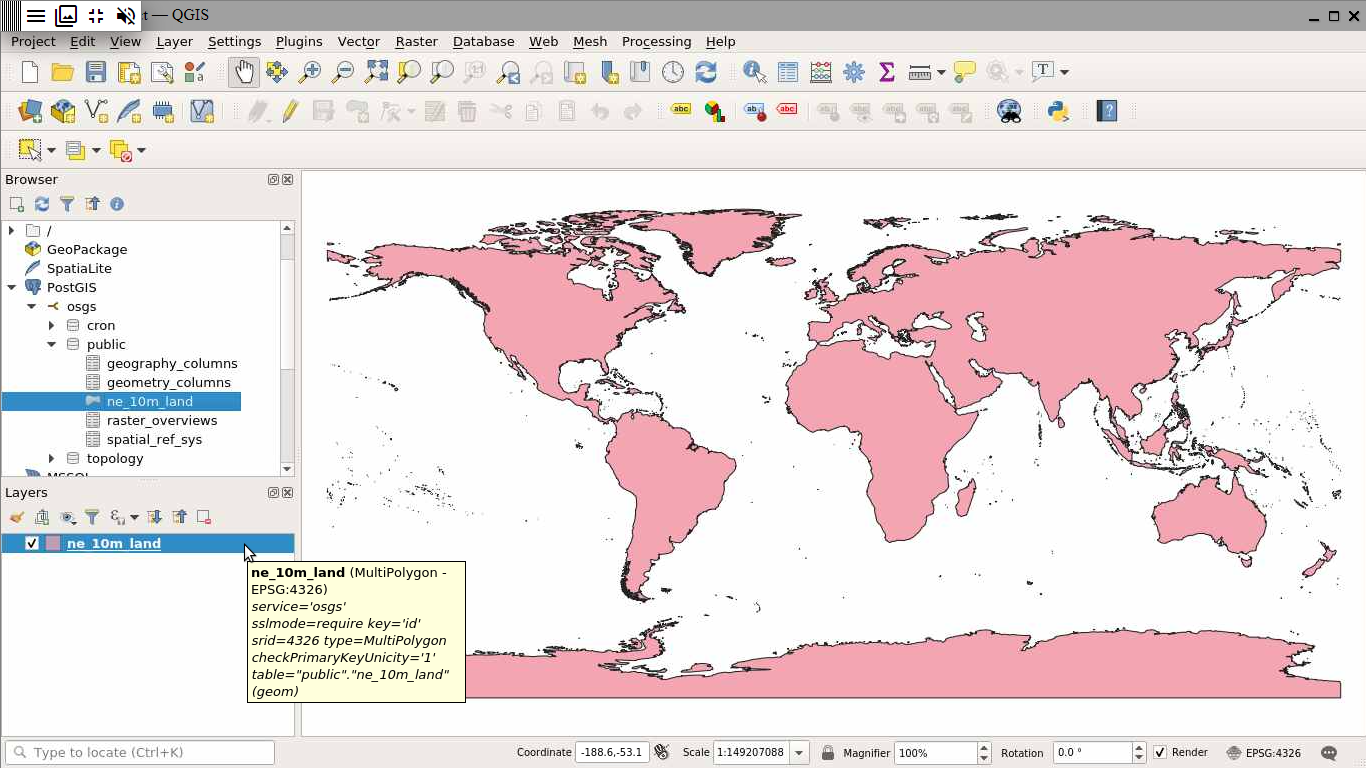
In your Browser Panel click on Refresh. You will see under the PostGIS option our new PostGIS connection. In the public schema you will find the ne_10m_land table which we added in the previous section. Double click on the table to add it as a vector layer in QGIS.