Connecting to GeoSpatialHosting
GeoSpatialHosting (GSH) is a managed hosting platform by Kartoza for open-source geospatial applications including GeoServer, GeoNode, and G3W. This guide shows how to provision a GeoServer instance on GSH and connect it to GeoTUI.
Step 1: Visit GeoSpatialHosting
Go to geospatialhosting.com and sign up or log in:

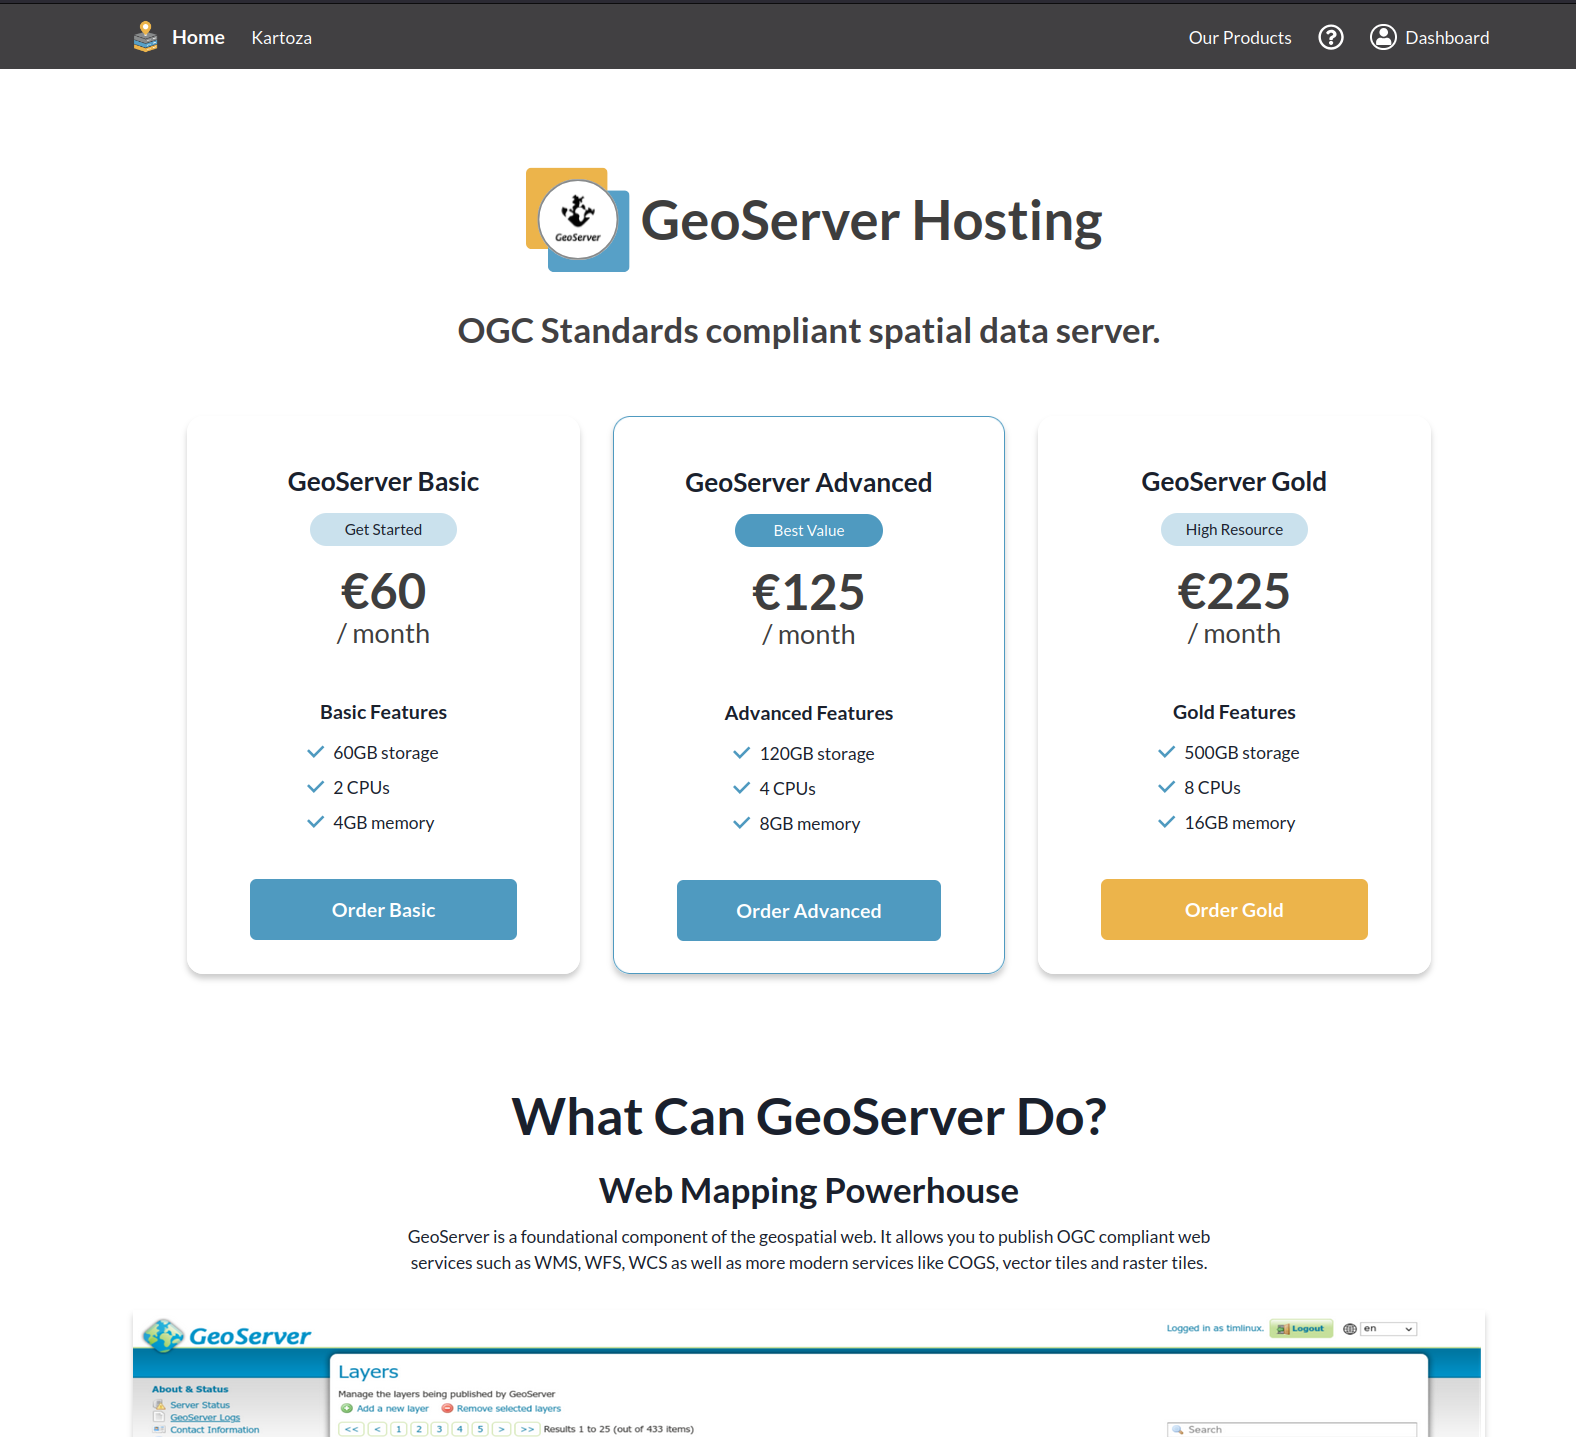
Step 2: Choose a GeoServer Plan
Navigate to the GeoServer product page. GSH offers three tiers:
| Plan | Storage | CPUs | Memory | Price |
|---|---|---|---|---|
| Basic | 60 GB | 2 | 4 GB | from 60 EUR/month |
| Advanced | 120 GB | 4 | 8 GB | from 125 EUR/month |
| Gold | 500 GB | 8 | 16 GB | from 225 EUR/month |
Step 3: Configure Your Instance
Choose your plan, select your company, and pick an application name. This name becomes your subdomain (e.g. tim-geoserver.sta.geospatialhosting.com):
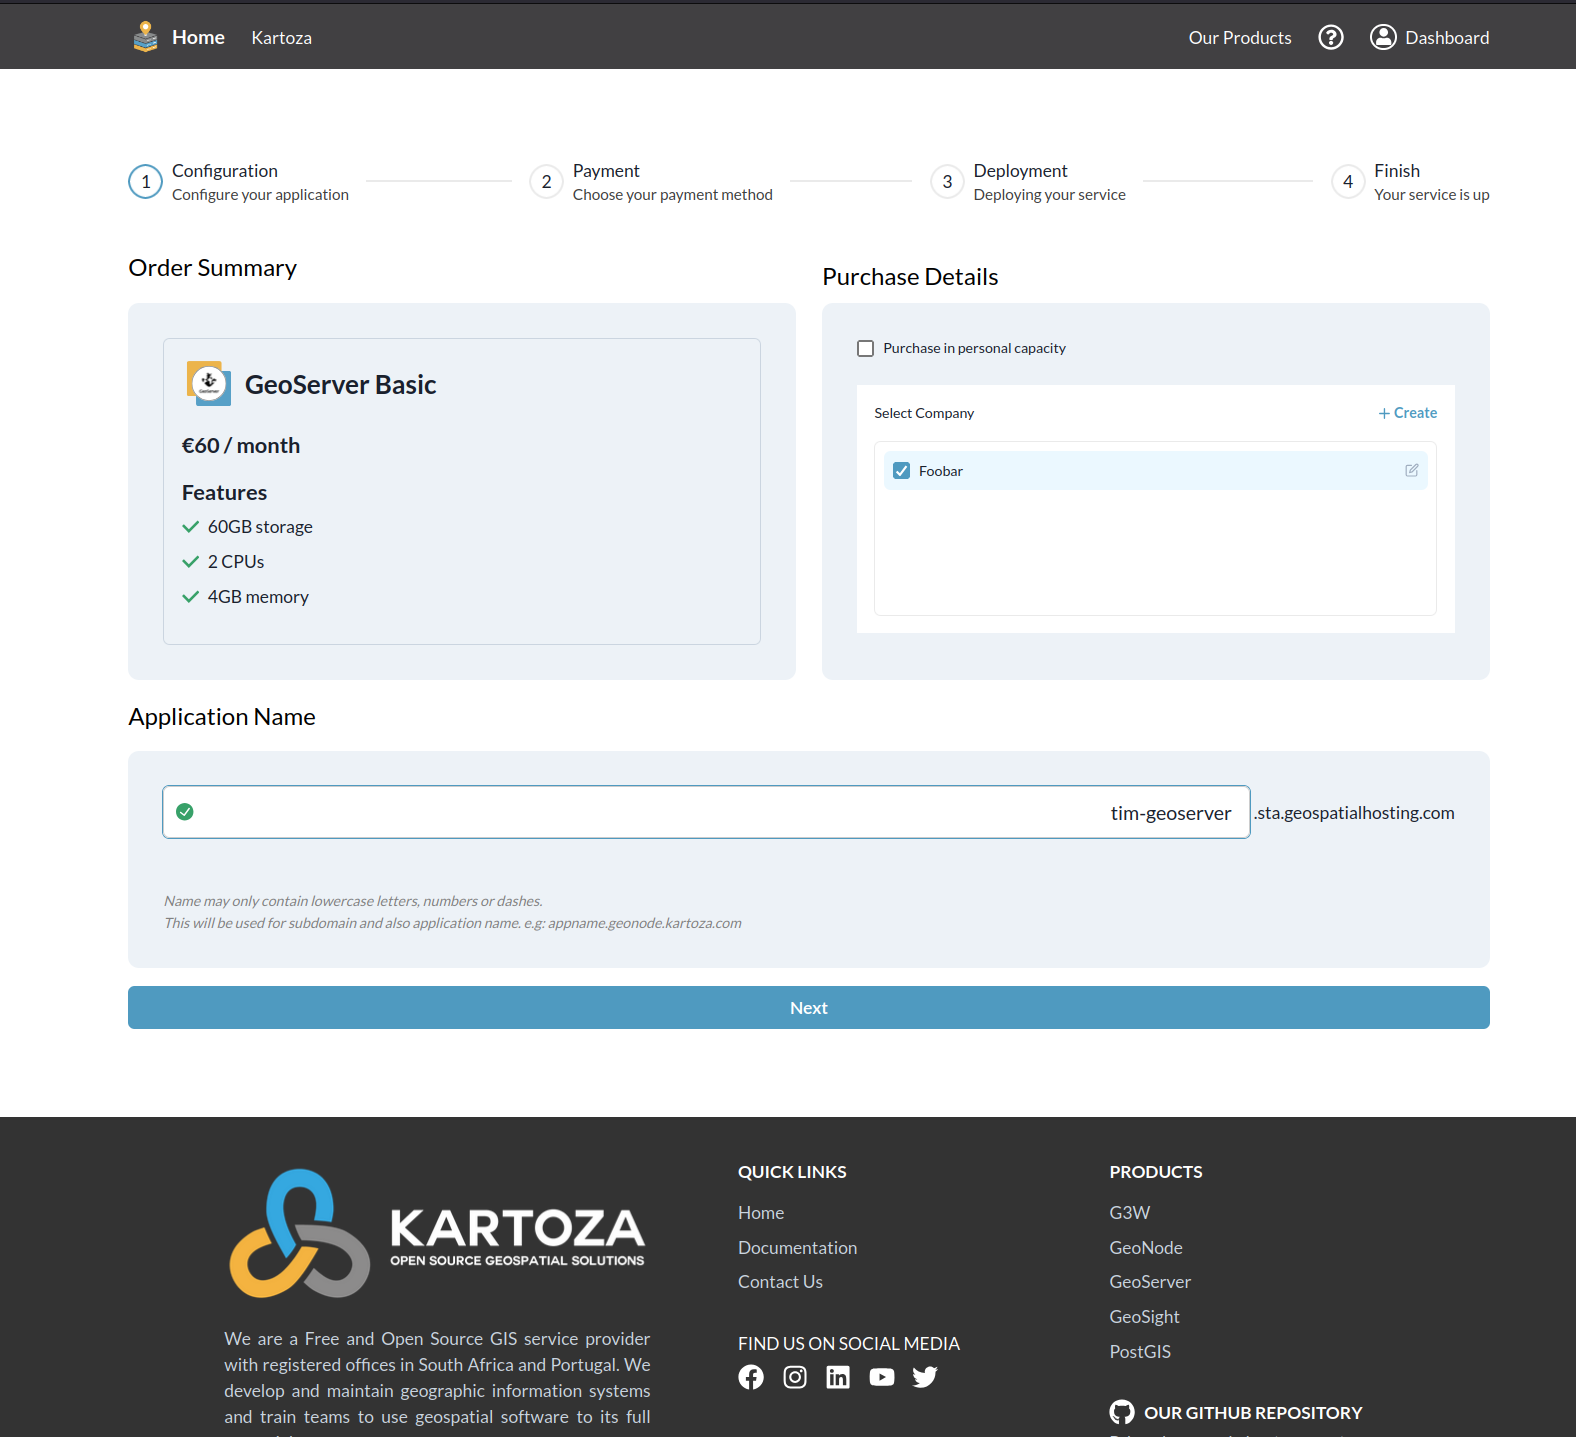
Naming your instance
The application name must contain only lowercase letters, numbers, and dashes. Choose something memorable — this will be the URL you enter in GeoTUI.
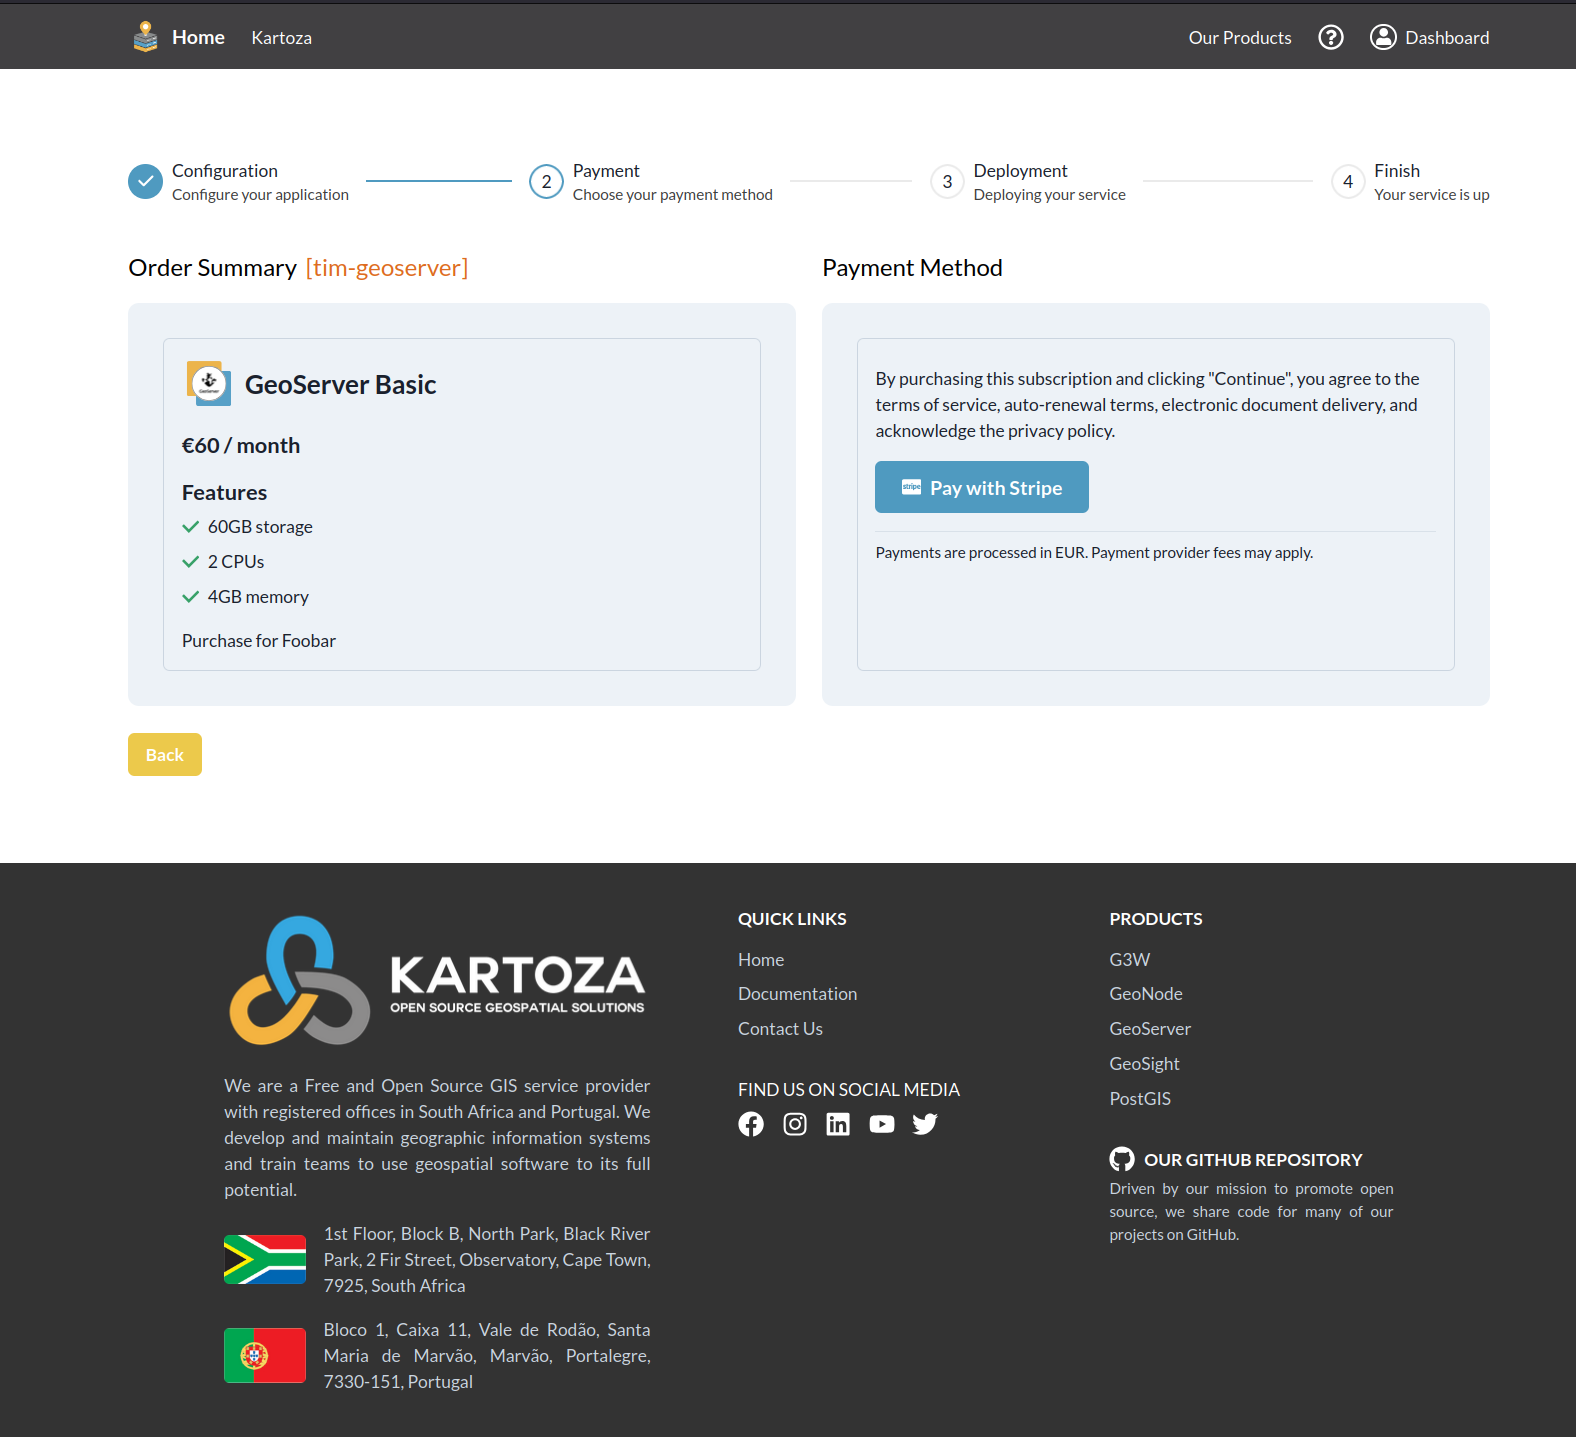
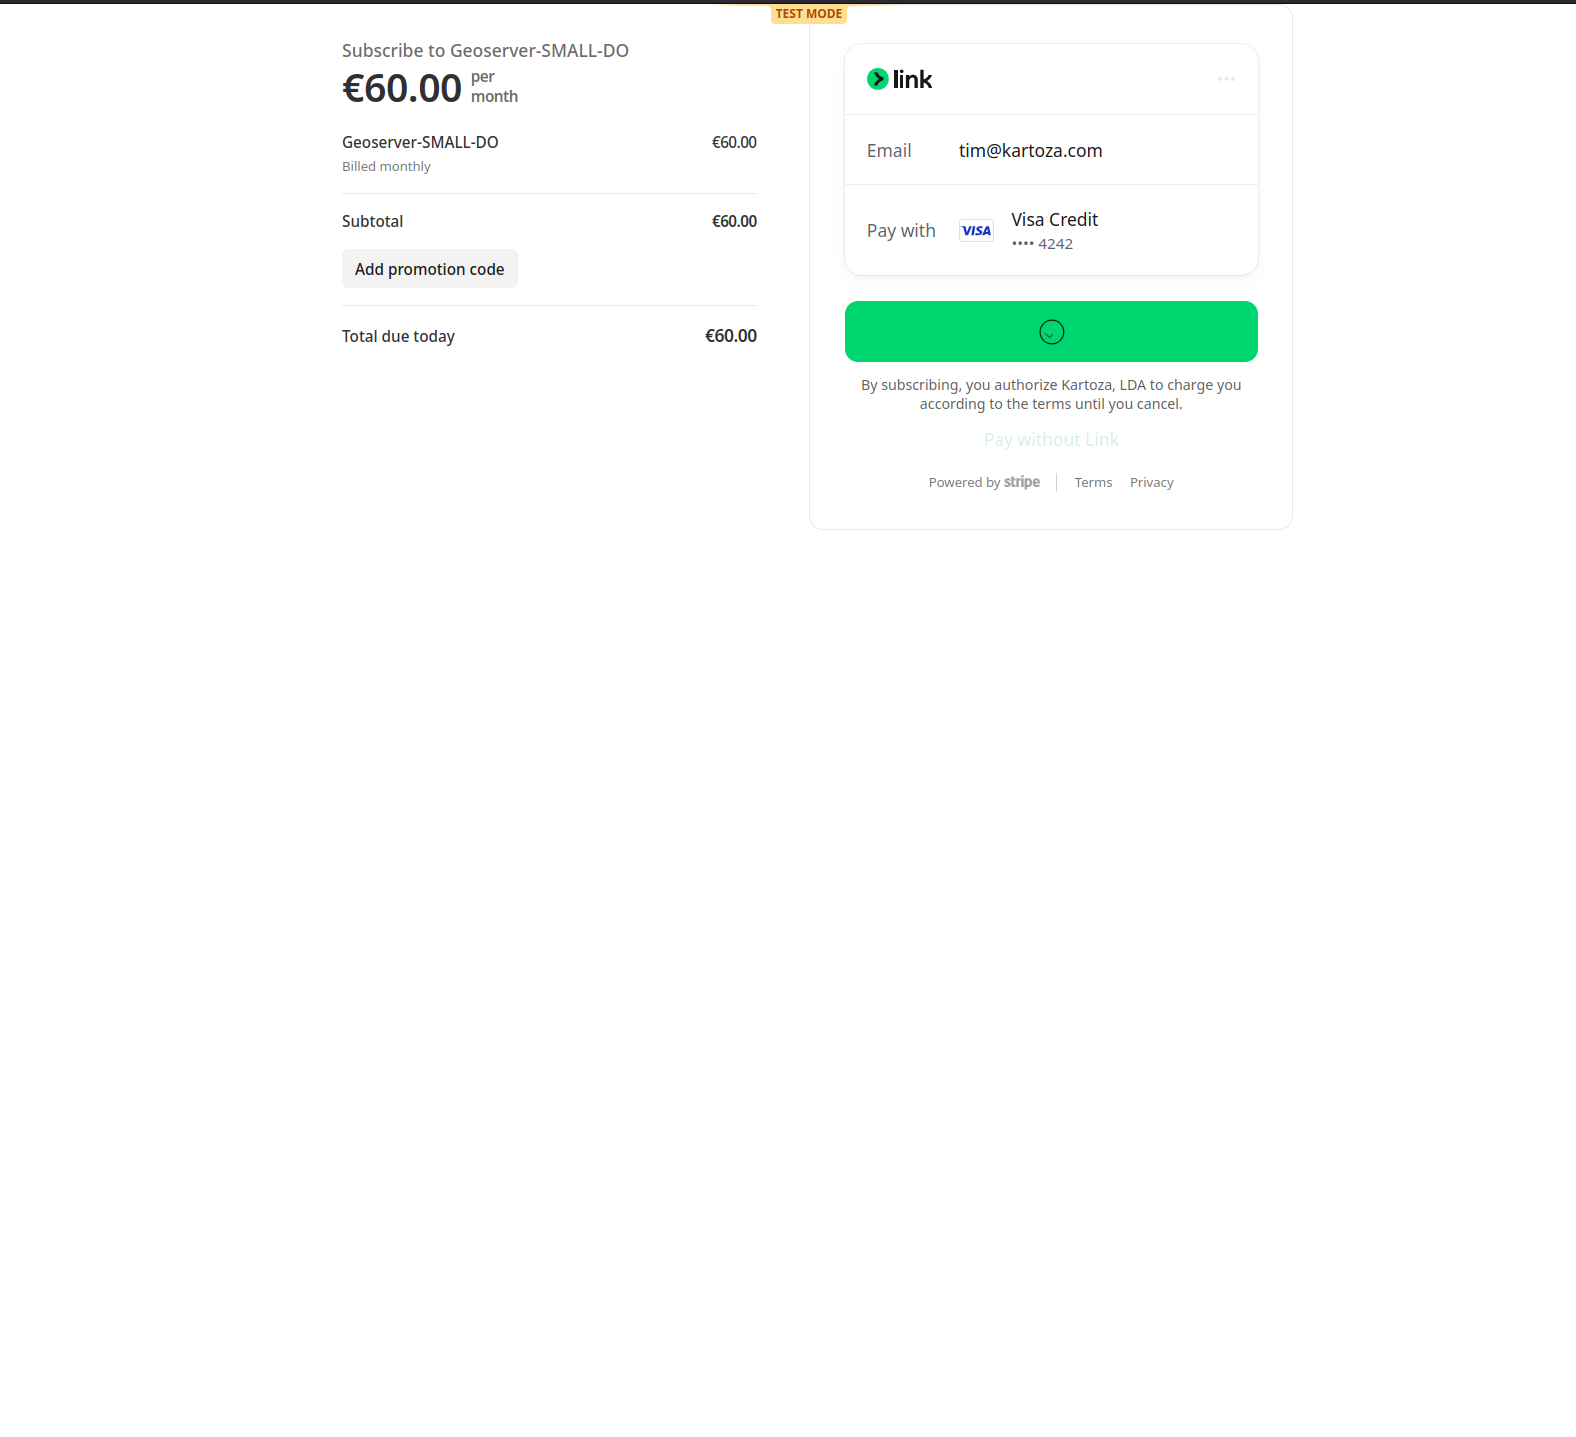
Step 4: Complete Payment
Review the Service Level Agreement and proceed to payment via Stripe:
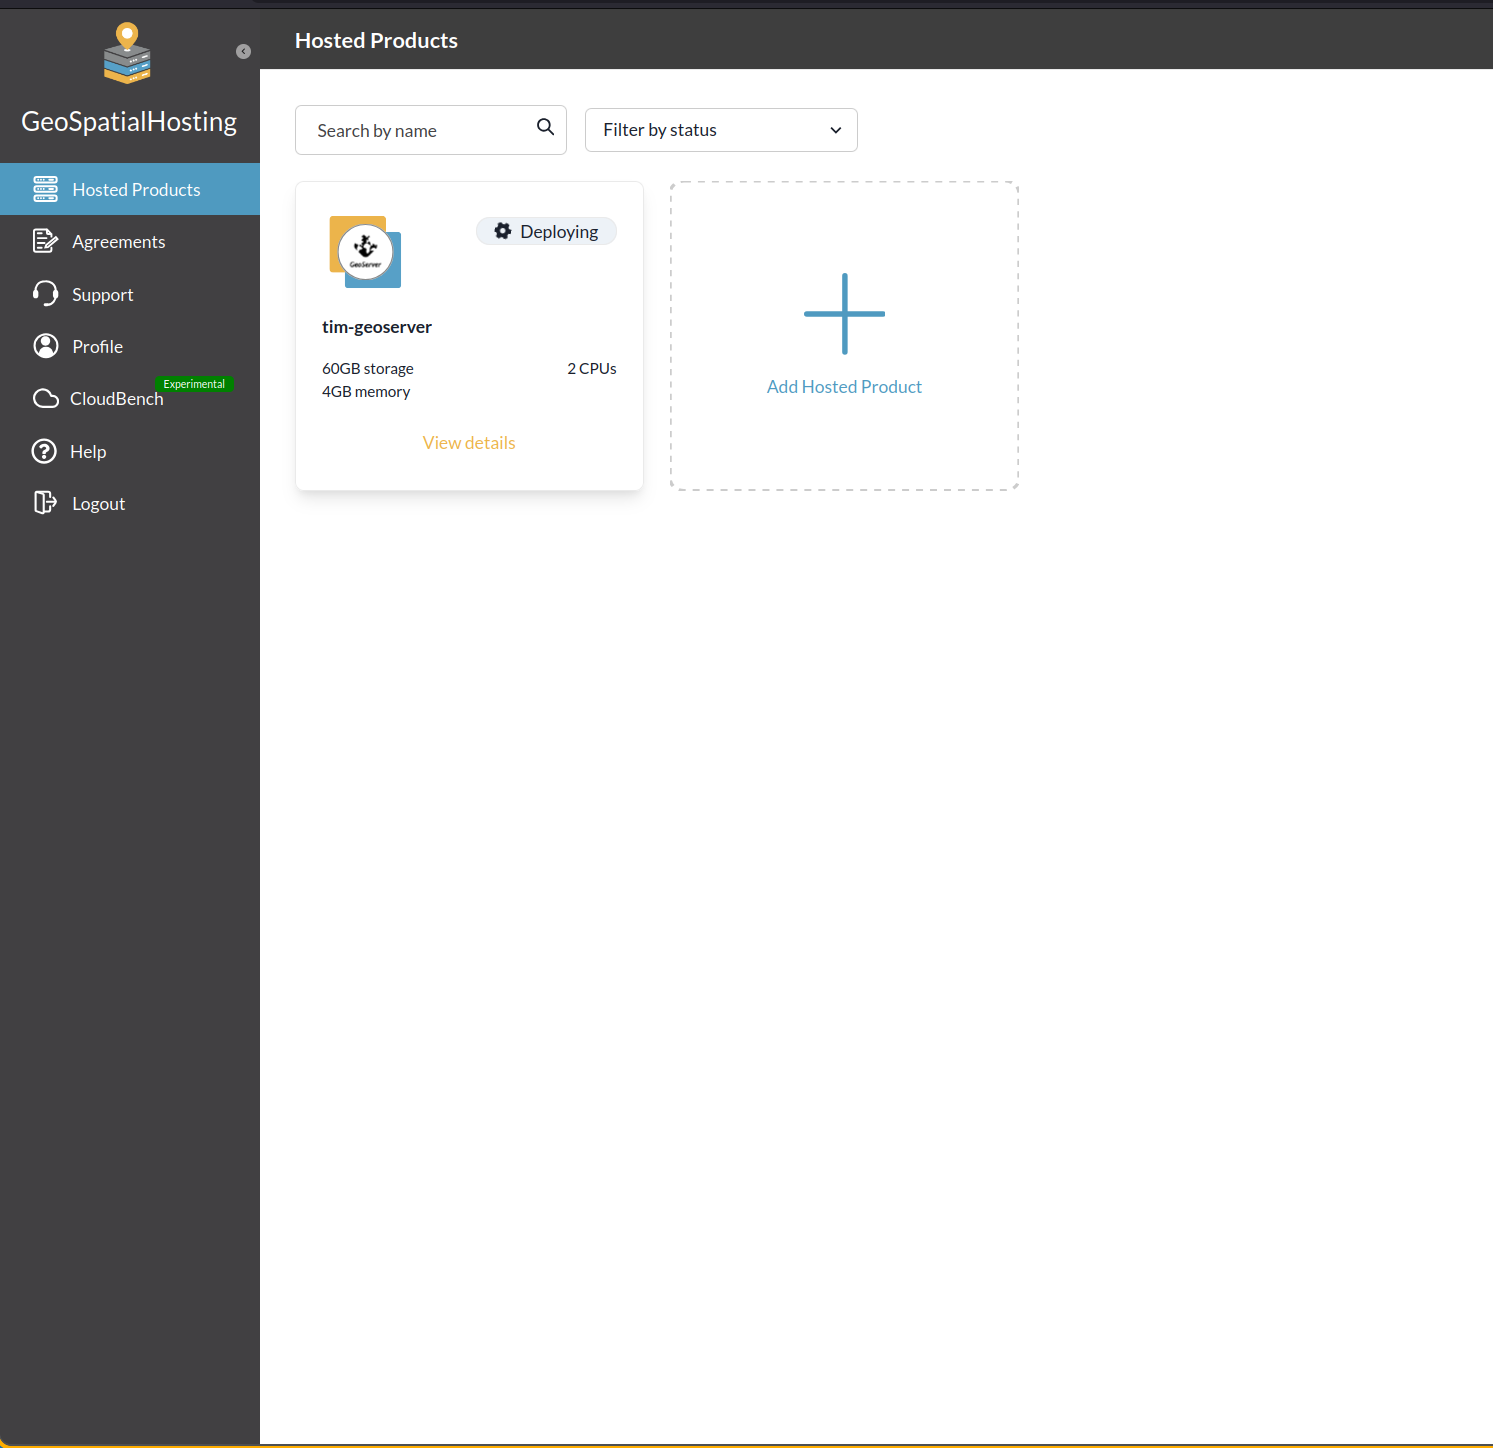
Step 5: Wait for Deployment
After payment, GSH provisions your GeoServer instance. This takes a few minutes:

You can monitor progress on the Hosted Products dashboard:
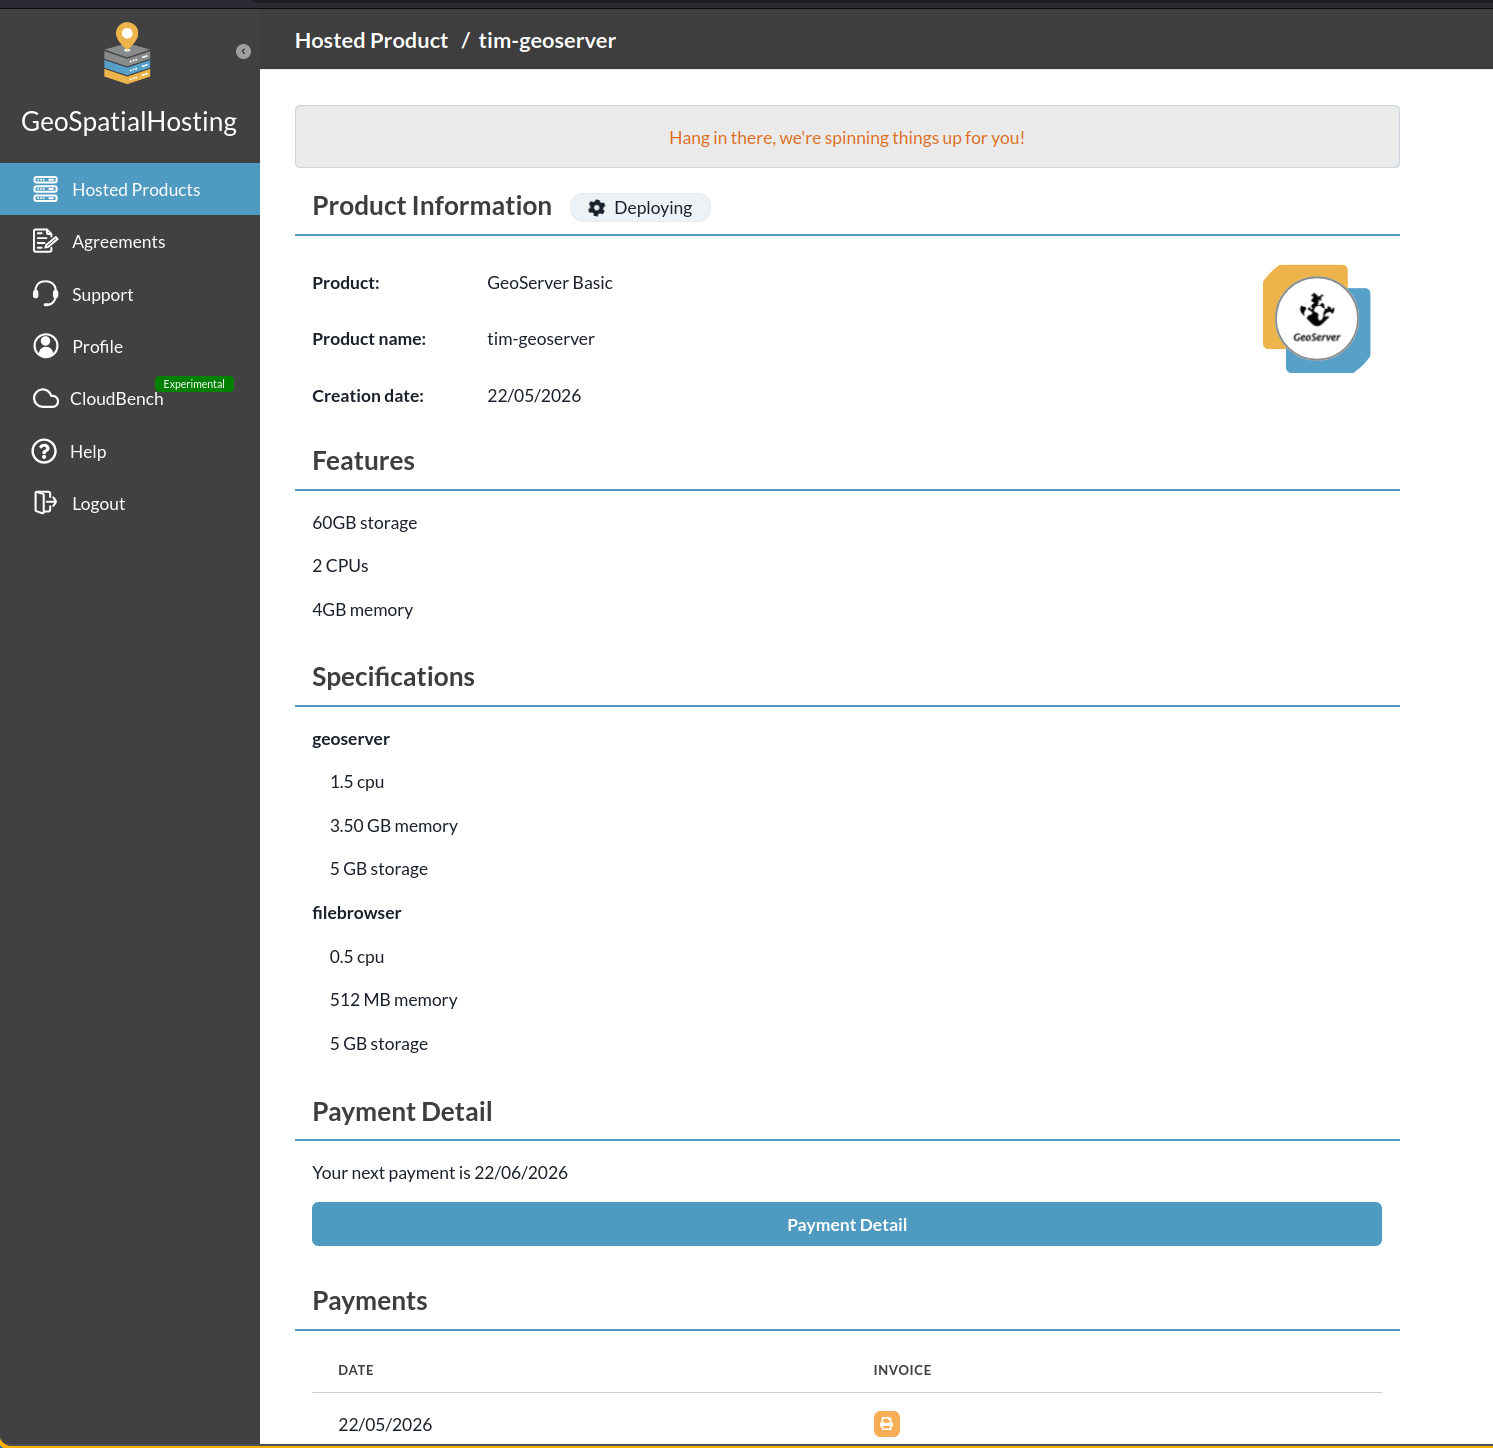
Once deployment completes, your product page shows the full details including connection credentials, resource specifications, and payment information:
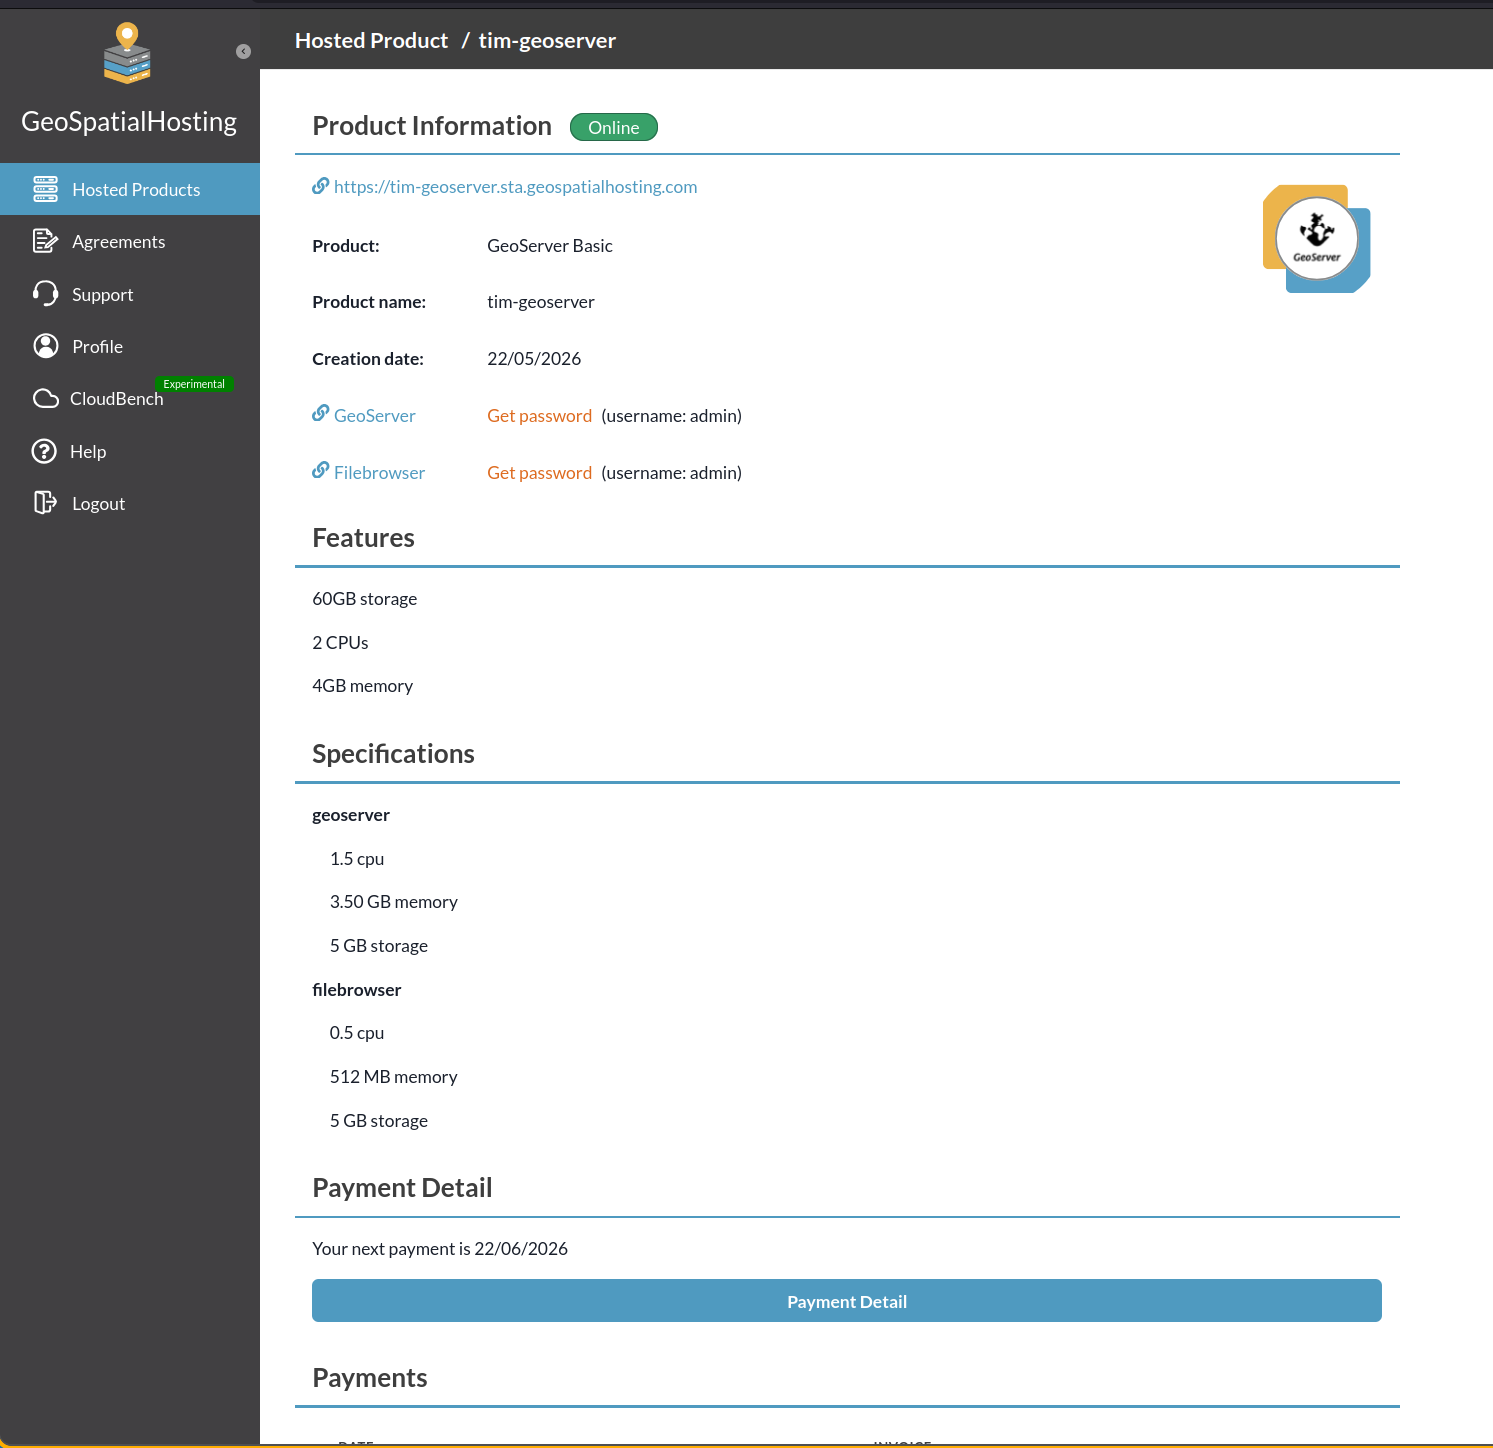
Finding your credentials
Click Get password next to the GeoServer entry to reveal your admin password. The username is admin by default. You'll need these to connect from GeoTUI.
Step 6: Connect from GeoTUI
Now open GeoTUI and press F9 to open Settings. Click Add and enter:
- Name:
Kartoza GeoServer Hosting(or any label you prefer) - URL:
https://your-name.sta.geospatialhosting.com/ - Username:
admin - Password: the admin password from your GSH dashboard
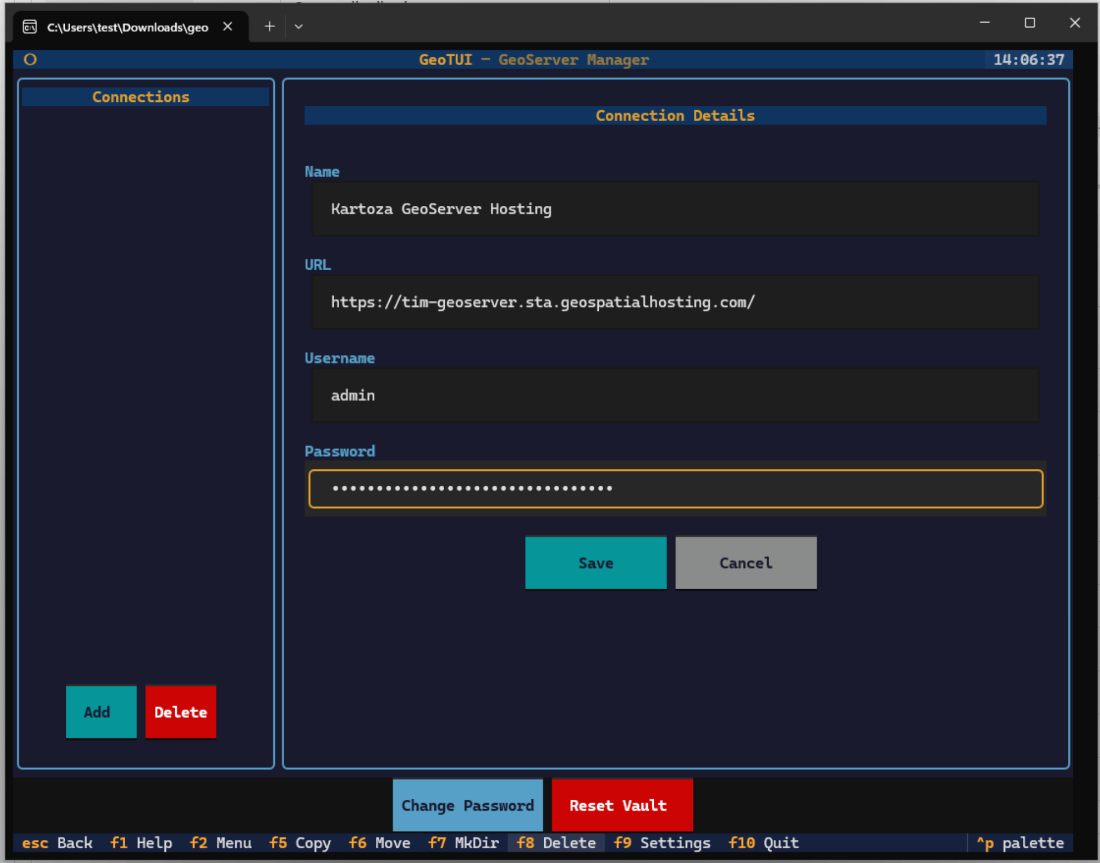
Click Save, then select the connection and click Connect:
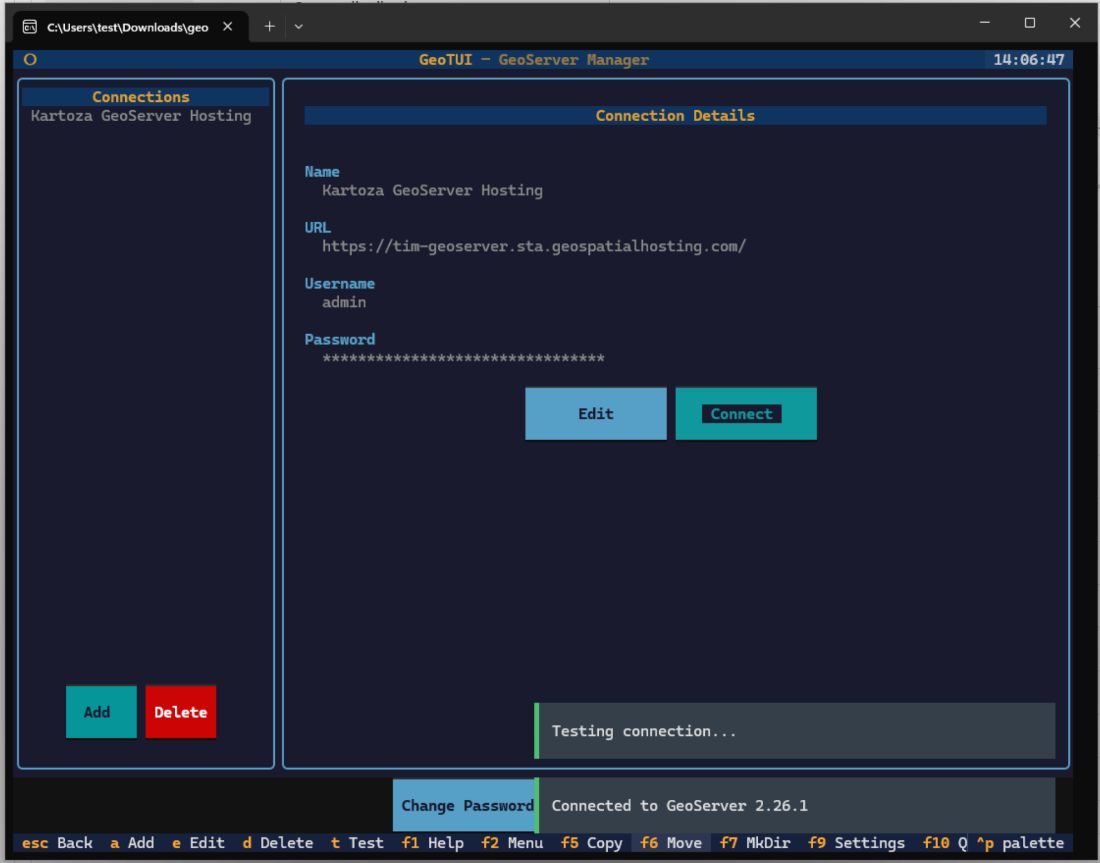
You should see "Connected to GeoServer 2.26.1" (or your deployed version). Press Escape to return to the main screen and start managing your GeoServer.
Troubleshooting
| Issue | Solution |
|---|---|
| "No workspaces found" | Your GeoServer is freshly deployed. Use F2 > Create Workspace to create one. |
| "Authentication failed" | Double-check your password in GSH dashboard. GeoTUI encrypts credentials locally. |
| Connection timeout | Ensure your instance is fully deployed (check GSH dashboard for "Running" status). |
| 404 errors | GeoTUI auto-detects the /geoserver path prefix. Ensure your URL doesn't include it. |
 by
by