Context Layers
Context Layers are additional spatial datasets that provide geographic context alongside your indicators. Unlike indicators, context layers are not tied to administrative boundaries or statistical values. Instead, they provide supporting information that helps users better understand what is happening on the map.
Common examples of context layers include:
- Roads and transport networks
- Schools and health facilities
- Weather and early warning data
- Satellite imagery services
- Environmental monitoring layers
Context layers can be sourced from external APIs and map services, allowing GeoSight to display live or regularly updated spatial information alongside indicator data.
The Context Layers page allows users to:
| Function | Description |
|---|---|
| Create Context Layers | Add new spatial layers from supported web services and datasets. |
| Search & Filter | Locate context layers using search, sorting, and filtering tools. |
| Edit Context Layers | Modify layer settings, URLs, labels, fields, and permissions. |
| Preview Layers | Validate connections and view layer content before saving. |
| Configure Display | Manage fields, labels, and styling options. |
| Share Access | Control which users or groups can access the layer. |
Supported Context Layer Types
GeoSight supports several different context layer sources.
| Layer Type | Description |
|---|---|
| ArcGIS | Feature services hosted in ArcGIS Online or ArcGIS Enterprise. |
| GeoJSON | Vector data provided through a GeoJSON URL. |
| Raster Tile | XYZ tile services used for map visualization. |
| Raster COG | Cloud Optimized GeoTIFF datasets. |
| Vector Tile | Vector tile services delivered through XYZ endpoints. |
| Related Table | Existing related tables managed within GeoSight. |
| Cloud Native GIS Layer | Layers available from configured cloud-native GIS services. |
Step 1: Open the Context Layers Page
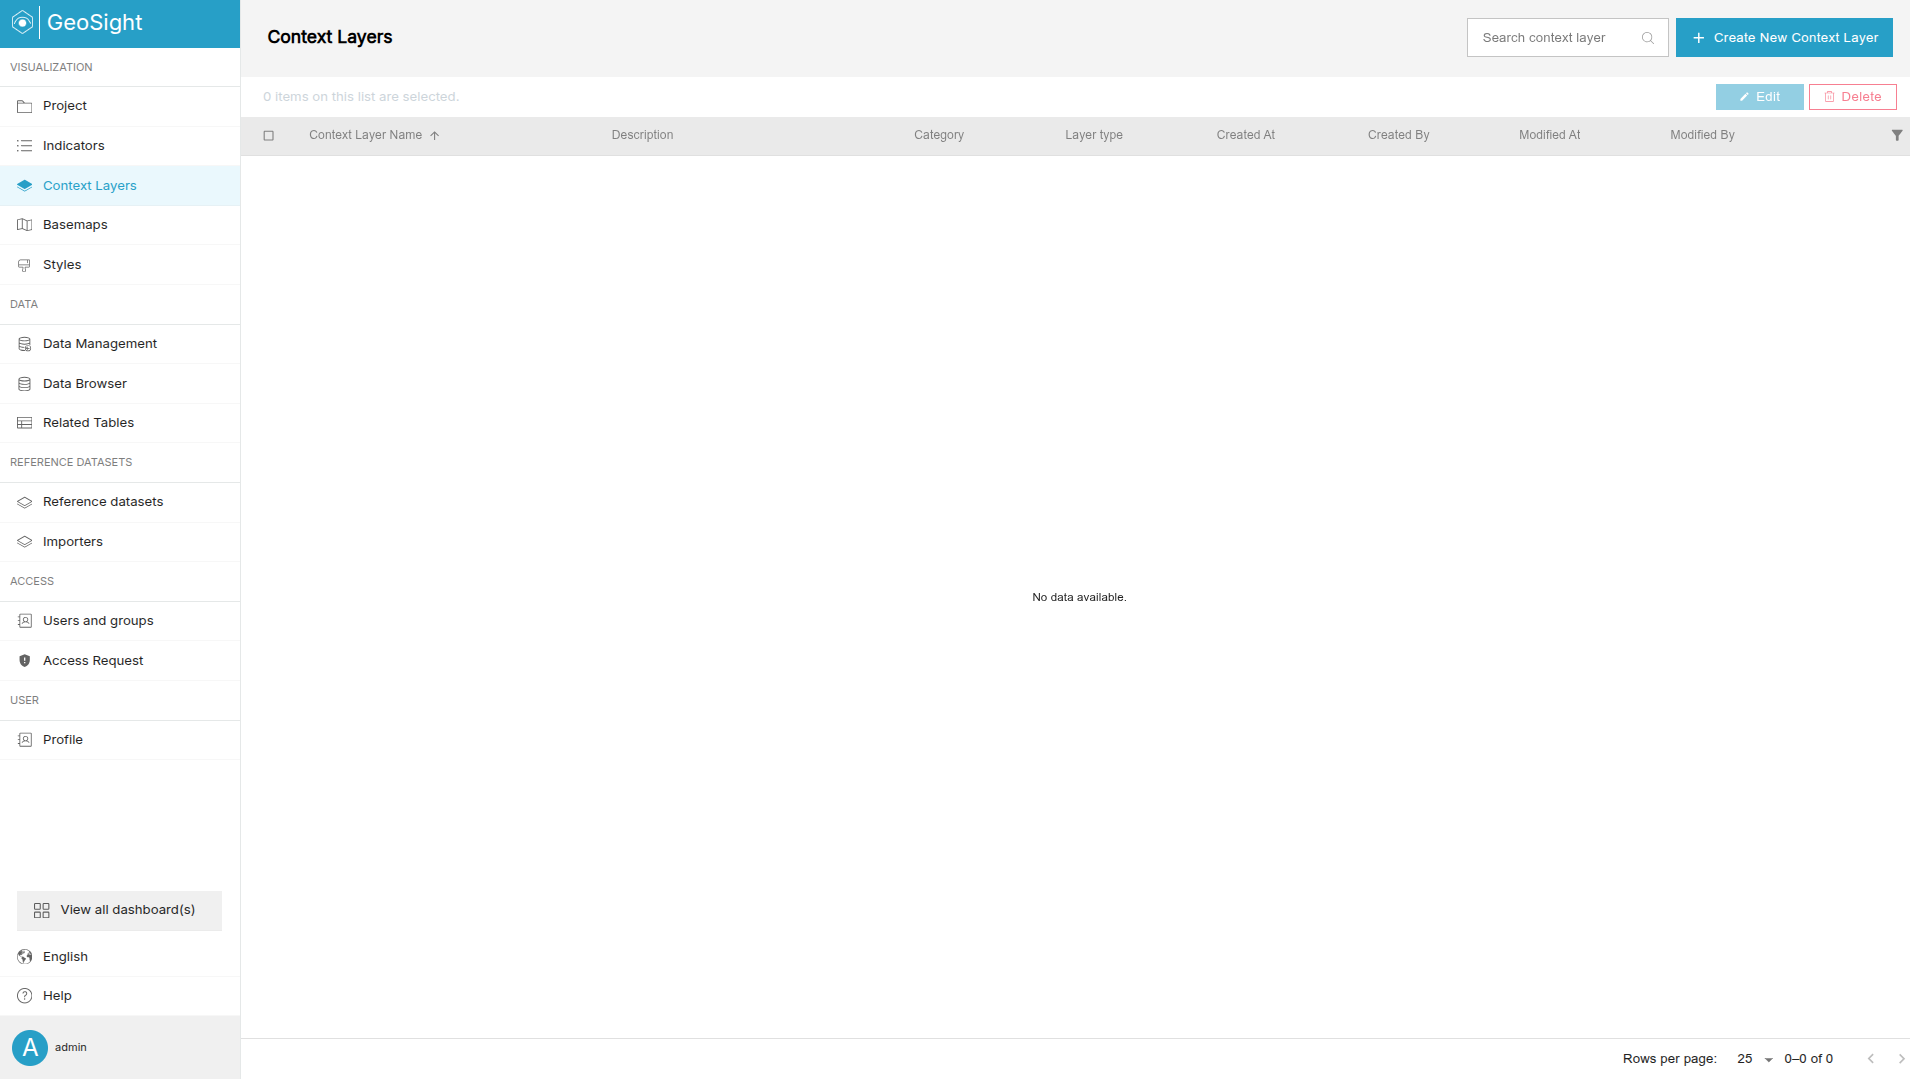
The Context Layers page is the central location for managing all context layers available within GeoSight.
-
In the left-side navigation panel, click Context Layers.
-
Use the Search Context Layer field to locate existing layers.
-
Select a layer checkbox to enable editing or deletion options.
Step 2: Create a New Context Layer
Creating a context layer connects GeoSight to an external spatial data source.
-
Click Create New Context Layer.
-
Complete the required fields in the General tab.
-
Click Save.
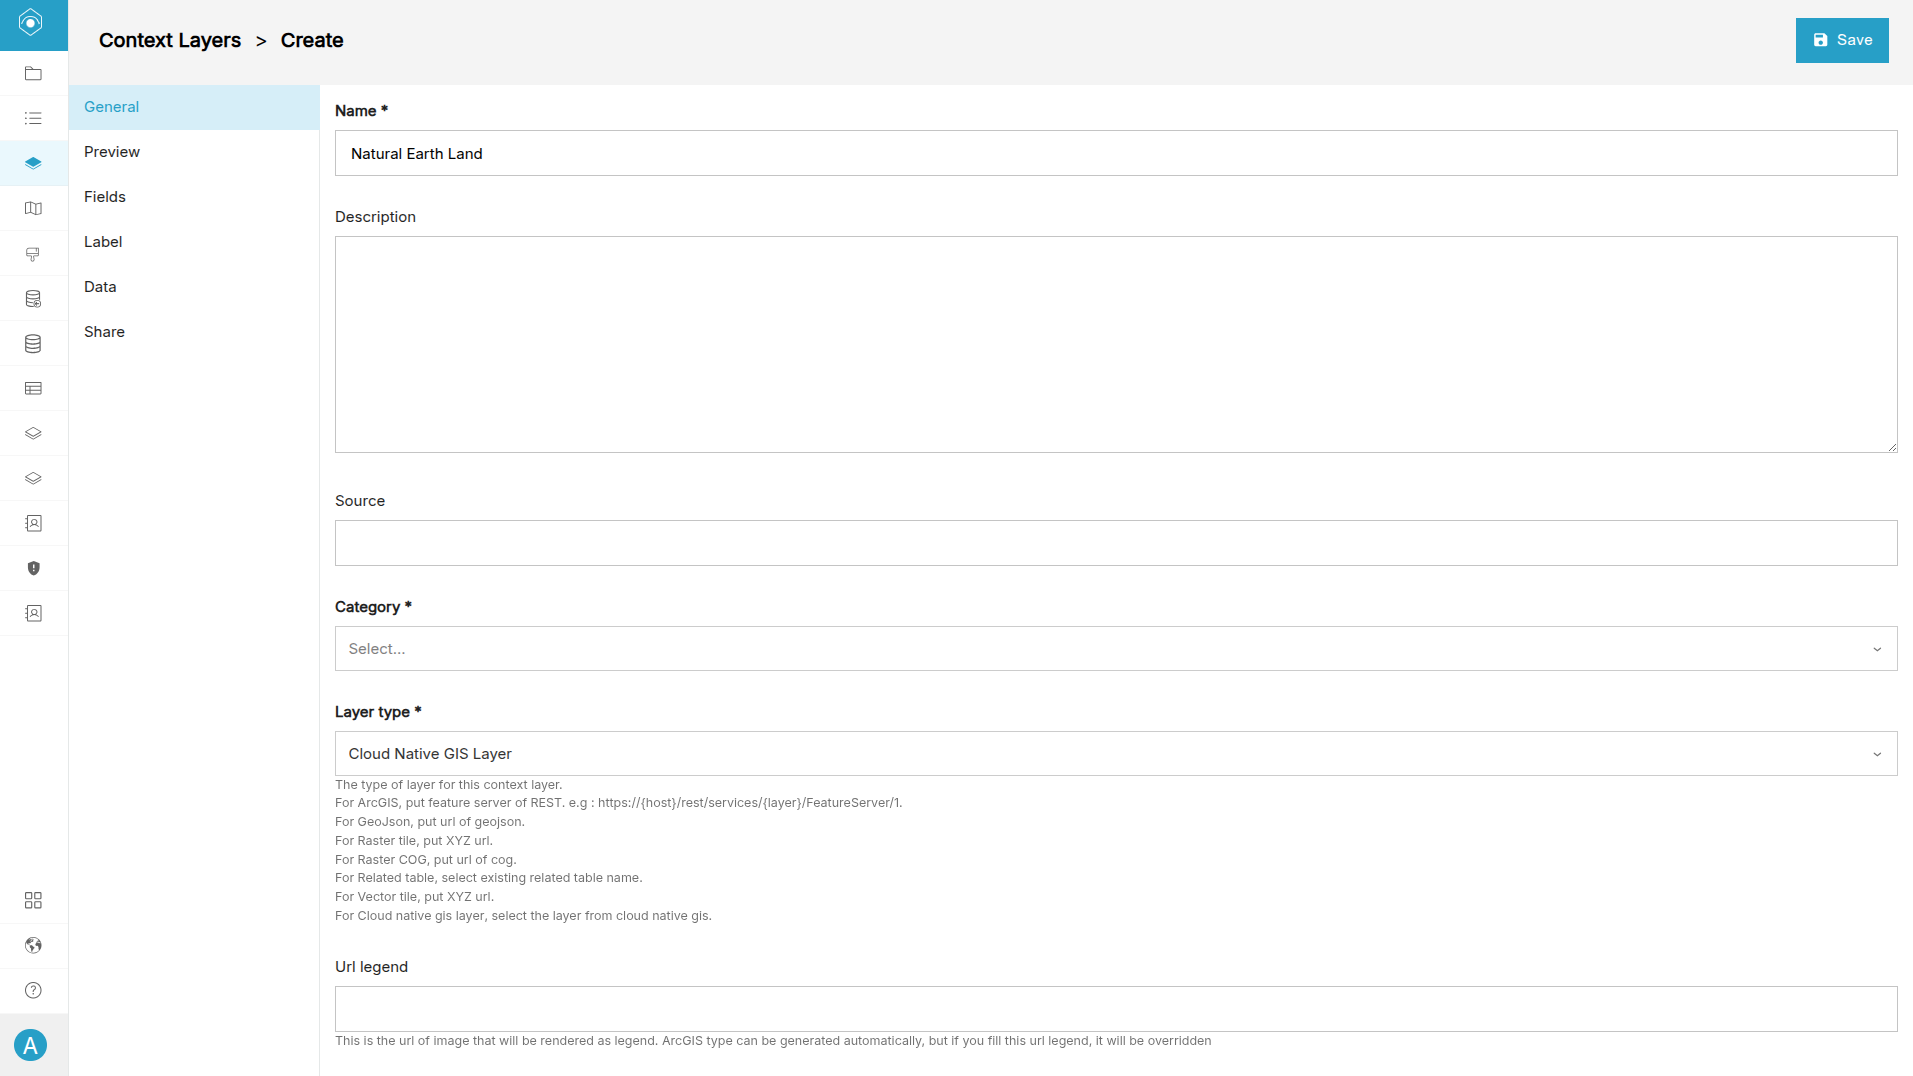
The General tab contains the connection settings required to access the layer.
| Field | Description |
|---|---|
| Name | The display name of the context layer. |
| Description | Optional information describing the layer. |
| Category | The category used to organize context layers. |
| URL | The service URL used to access the layer. |
| Layer Type | Defines the type of service or dataset being connected. |
| ArcGIS Config | Optional ArcGIS authentication profile. |
| Token / Username / Password | Optional credentials required to access secured services. |
Step 3: Preview the Layer
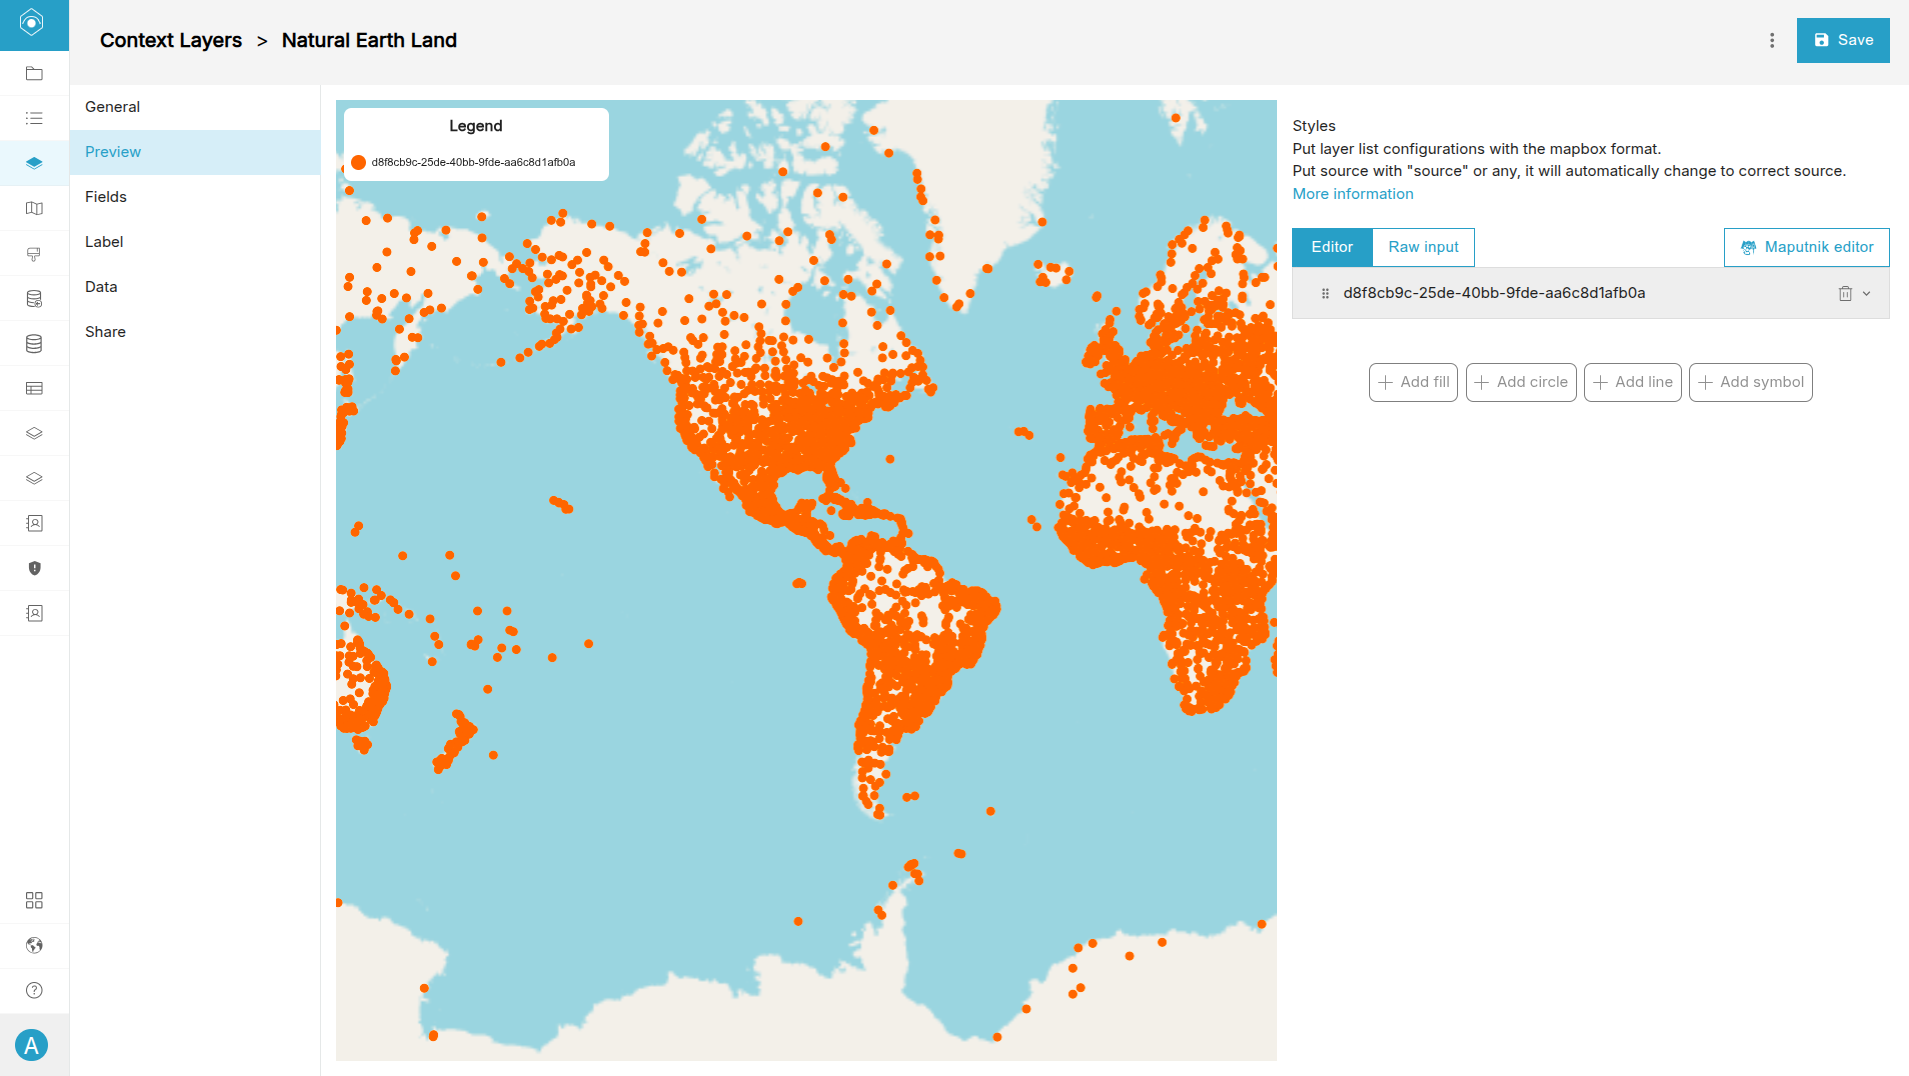
Before saving, GeoSight can preview the layer and validate the connection.
-
Open the Preview tab.
-
Verify that the layer loads successfully.
-
Review the map display for any errors or missing data.
If the connection is unsuccessful, verify:
- The service URL is correct
- Authentication credentials are valid
- The service is publicly accessible or properly secured
- The selected layer type matches the service
Step 4: Review Fields
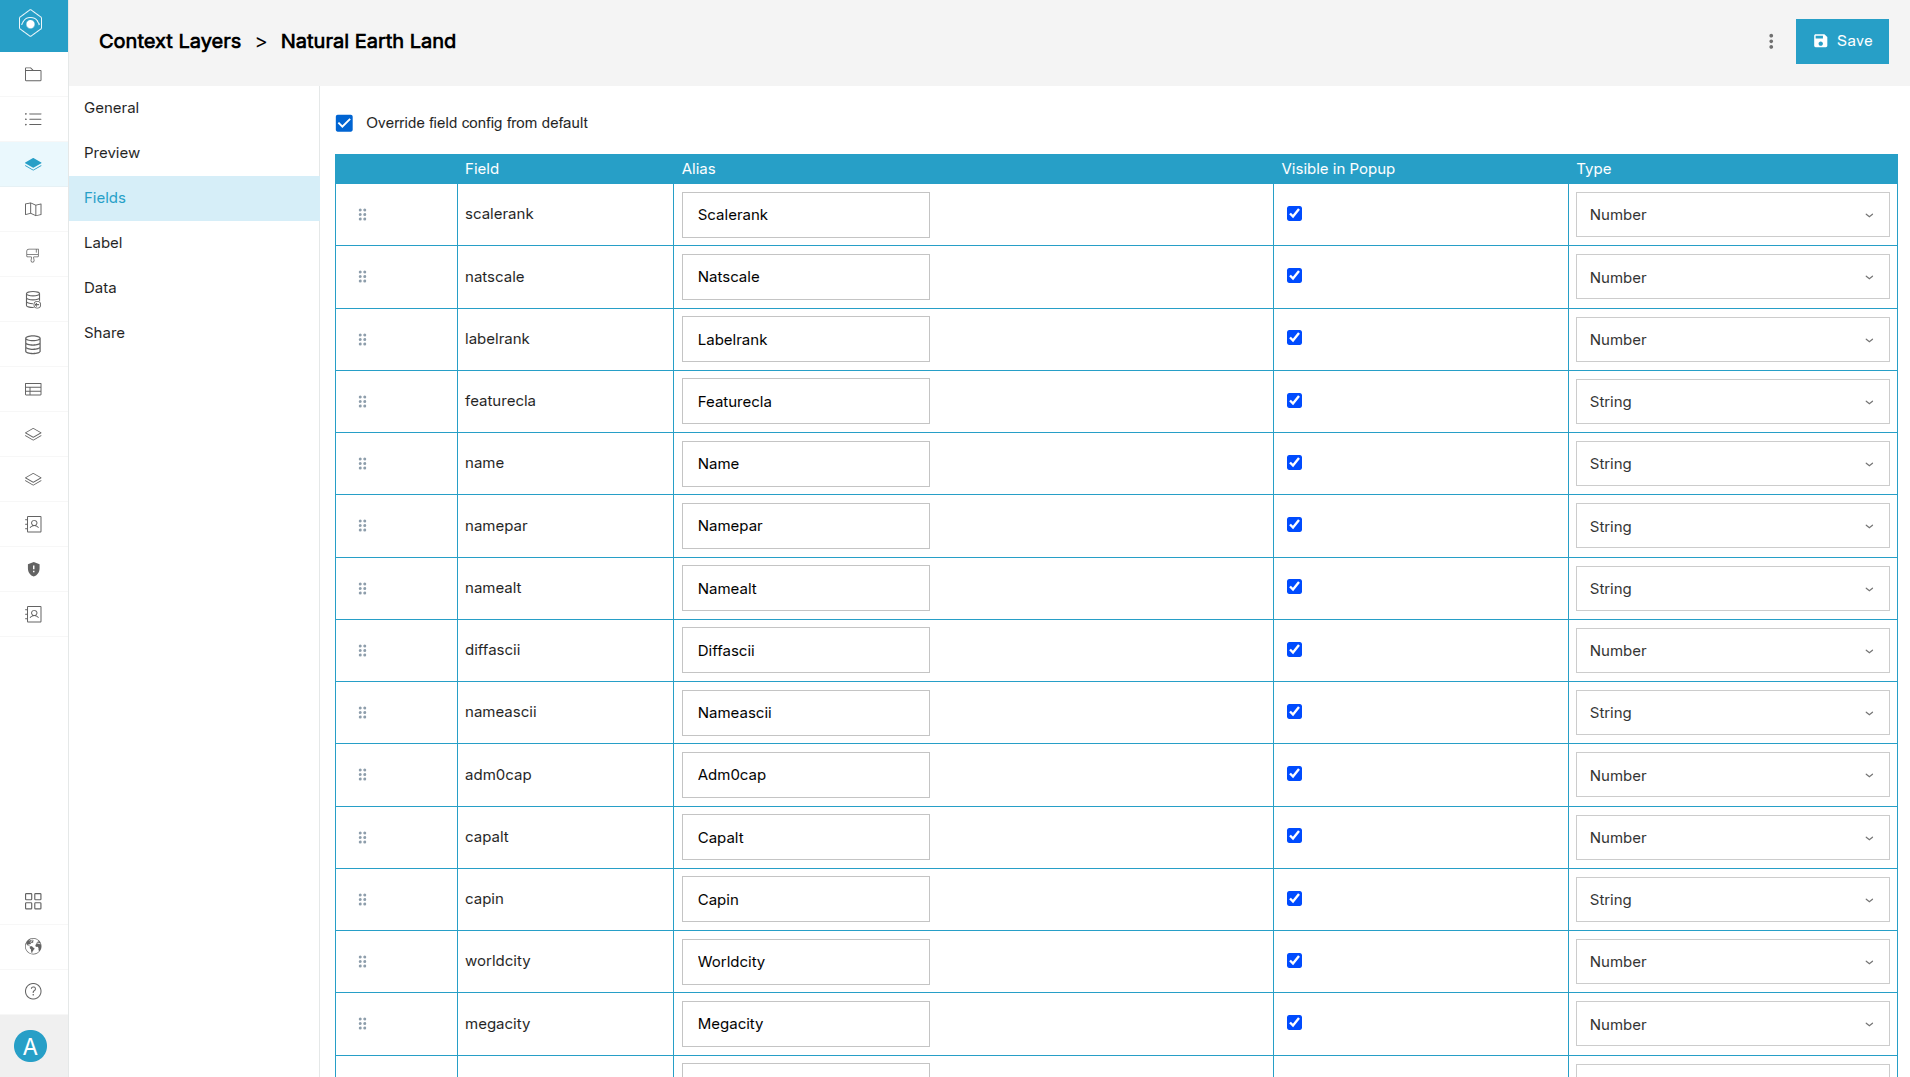
The Fields tab allows users to review the attributes available within the layer. This step is useful for validating the structure of the dataset before it is used within projects and dashboards.
-
Open the Fields tab.
-
Verify that the expected fields are present.
-
Review field names and attribute values.
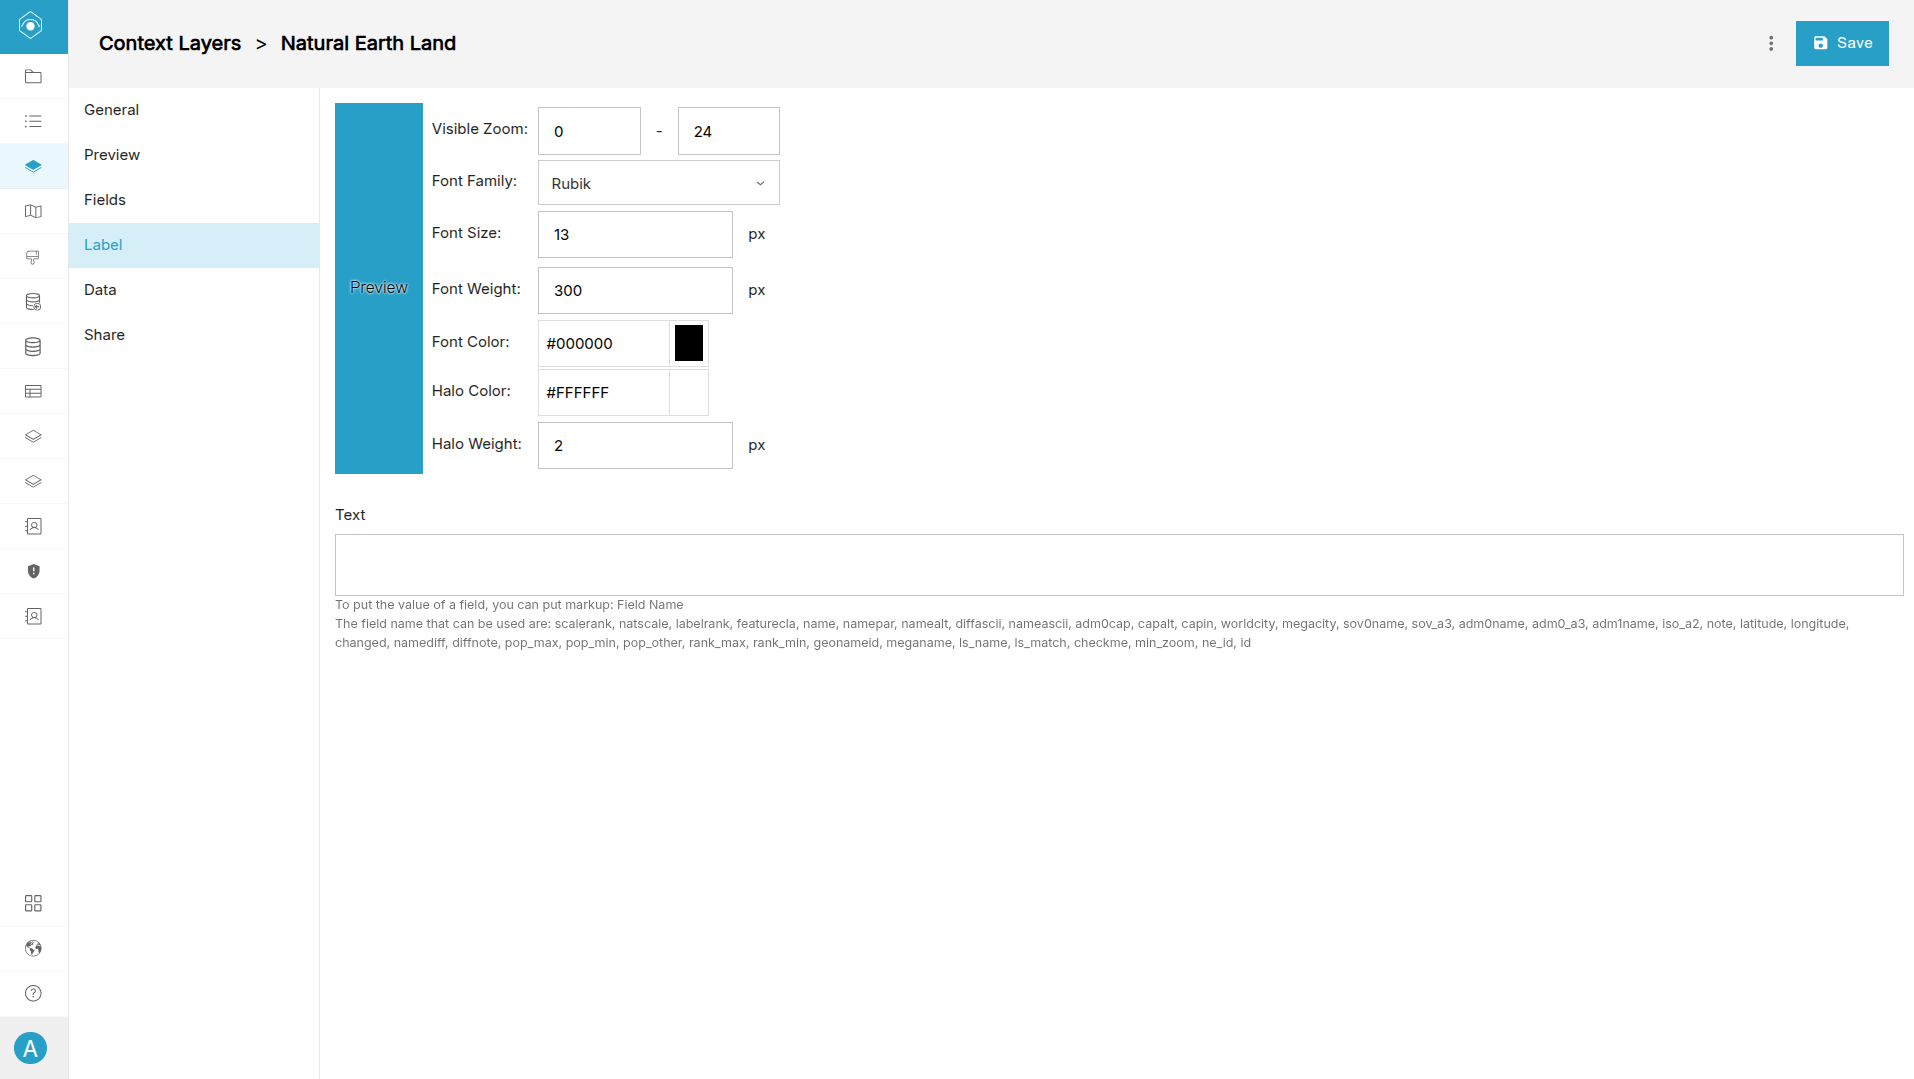
Step 5: Configure Labels
Labels control how information is displayed directly on the map.
-
Open the Label tab.
-
Configure the label field and display settings.
-
Preview the labels.
-
Save your changes.
Managing Existing Layers
The Context Layers table provides several tools for managing existing layers.
| Action | Description |
|---|---|
| Edit | Modify layer settings, fields, labels, or permissions. |
| Delete | Remove a context layer from GeoSight. |
| Share | Manage access permissions. |
| Search | Find layers using keywords. |
| Sort | Arrange records in ascending or descending order. |
| Filter | Display layers matching specific criteria. |
Next up: Learn how to configure Filters and Widgets to create interactive dashboards and improve user-driven exploration of your GeoSight data.