Reference Datasets
Reference Datasets define the administrative boundaries used throughout GeoSight for mapping, filtering, and visualizing indicator data. These datasets form the geographic foundation of your dashboards and are typically made up of countries, provinces, districts, or other administrative boundaries.
Before uploading your dataset, ensure that:
| Requirement | Description |
|---|---|
| Geometry | Polygon geometries representing administrative boundaries. |
| Format | .zip Shapefile, .geojson, .json, or .gpkg. |
| Unique Code | Each feature must contain a unique identifier field such as ucode. |
| Name Field | Each feature should contain a readable boundary name field such as name. |
| Parent Codes | Sub-level administrative layers should contain parent administrative codes to preserve hierarchy relationships. |
Recommended Reference Dataset Structure
GeoSight uses administrative hierarchy relationships to link boundaries across multiple levels.
| Administrative Level | Required Fields | Example |
|---|---|---|
| Level 0 | ucode, name | Country boundaries |
| Level 1 | ucode, name, adm0_ucode | Province or state boundaries |
| Level 2 | ucode, name, adm1_ucode | District or municipal boundaries |
Step 1: Create a New Reference Dataset
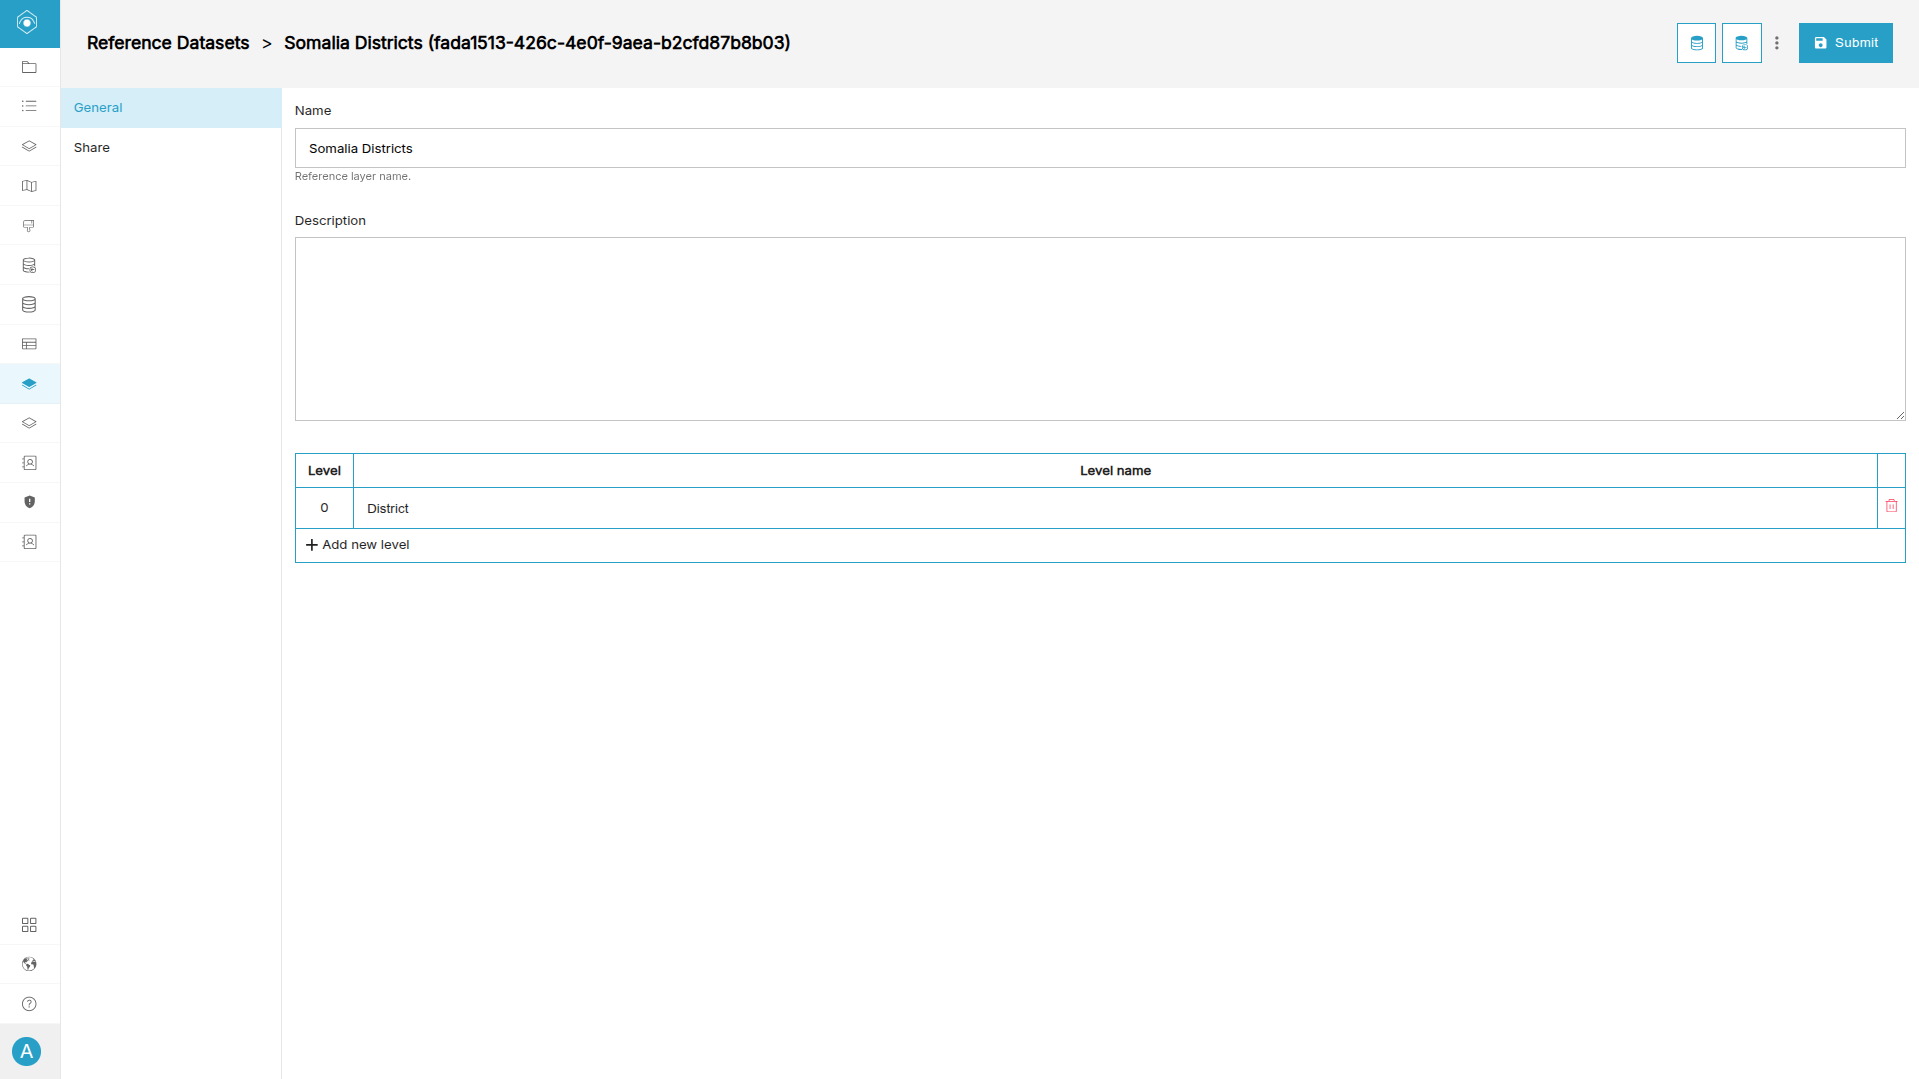
Start by creating the reference dataset container that will store your administrative boundaries.
-
Navigate to Reference Datasets.
-
Click Create New Reference Dataset.
-
Enter a descriptive dataset name such as Somalia Districts.
-
Click Add New Level.
-
Define the administrative level name (e.g. District).
-
Click Submit.
Step 2: Import Boundary Data
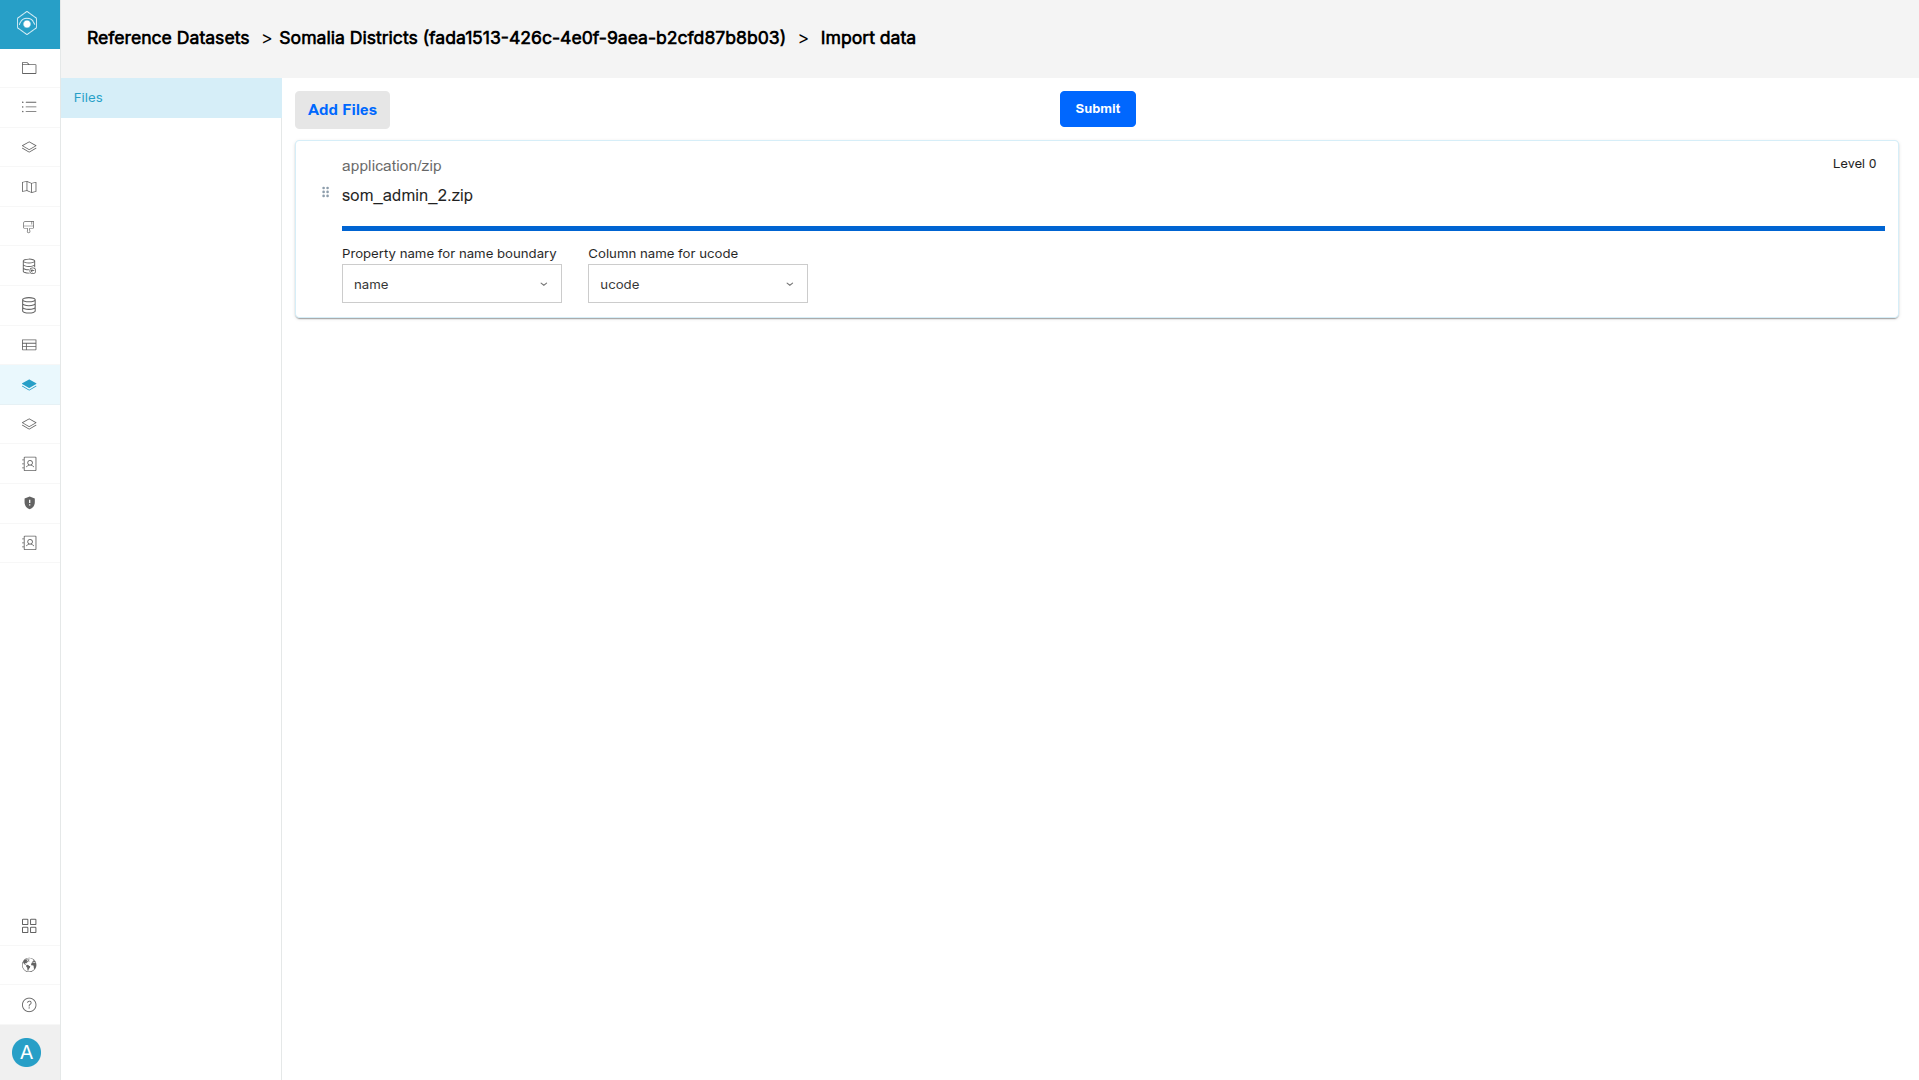
Once the dataset structure is created, you can upload your administrative boundary file.
-
In the upper-right corner, click Import Data.
-
Drag and drop your dataset file, or click to browse.
-
Upload one of the supported formats:
- .zip Shapefile
- .geojson
- .json
- .gpkg
-
Select the field containing the boundary names.
-
Select the field containing the unique geographic codes.
-
Click Submit.
Step 3: Verify Imported Boundaries
After the upload completes, GeoSight will process and register the uploaded administrative boundaries.
Verify that:
- All polygons appear correctly
- Boundary names are readable
- Unique codes are assigned correctly
- Parent administrative relationships are preserved
- No missing or duplicate geographic codes exist
Next up: Learn how to create Indicators in GeoSight.